Free Shipping for US Continental Orders $99+

    15% OFF Valentines Day

    Use Code:WATTSOFLOVE
    DAYS
    HRS
    MINS
    SECS
    SHOP NOW

    DIY Protection Kit for Model Y

    Tempered Glass (9H) Screen Protector for Model 3/Y

    DIY Vehicle Wrap

    At TESBROS, we’ve helped thousands of Tesla owners customize and protect their cars with high-quality wraps and accessories. With years of experience in Tesla customization, we’re a trusted resource for anyone looking to make their car stand out while keeping it protected. Whether you’re a seasoned DIYer or just starting out, we’re here to make the process easy and successful.

    DIY Vehicle Wrap

    Filter
    5 products
     

    Key Takeaways:

    • Cost Savings and Creative Control: Learn how to save money and customize your Tesla with a DIY vinyl wrap, giving you full control over the design and application process.
    • Tools and Techniques for Success: Discover essential tools and step-by-step techniques to achieve a flawless wrap while avoiding common mistakes.
    • Comprehensive Guidance: Gain insights into cost comparisons, maintenance strategies, and tips to decide if a DIY wrap is the best option for your needs.

    TESBROS: Tesla Exterior Customization Color Wraps

    TESBROS offers a range of exterior customization options for Tesla vehicles, including color wraps, chrome delete kits, and pillar delete wraps. These products are designed to enhance the appearance of Tesla models such as the Model 3, Model Y, Model S, Model X and Cybertruck. 

    • Color Wraps: TESBROS provides DIY color vinyl wrap kits that allow owners to personalize their Tesla's exterior with various colors and finishes. These wraps are available for different models, including the Cybertruck, and come in materials from brands like Avery Dennison and 3M. 
    • Chrome Delete Kits: For a sleek, modern look, TESBROS offers chrome delete kits that replace the vehicle's chrome trim with matte or gloss finishes. These kits are available for multiple Tesla models and include pre-cut pieces for easy installation. 
    • Pillar Delete Wraps: To achieve a uniform appearance, pillar delete wraps cover the exposed pillar trims, creating a blackout effect. These wraps are designed for specific Tesla models and are part of TESBROS' exterior customization offerings. 

    For a visual representation of how different wraps would look on your Tesla, TESBROS provides an interactive 3D wrap visualizer featuring over 100 premium colors from Avery Dennison.

    Essential Tools And Materials For A DIY Vehicle Wrap

    To successfully wrap your Tesla, having the right tools and materials is essential. Below is a checklist to ensure you’re prepared for the job:

    Tools You’ll Need:

    • Vinyl Wrap Squeegee: Used to smooth out the wrap and remove air bubbles during application.
    • Heat Gun: Essential for softening the vinyl to make it pliable and easier to apply on curved surfaces.
    • Microfiber Cloths: Ideal for cleaning the surface of your car before applying the wrap.
    • Application Glove: Helps smooth the vinyl without damaging the material or leaving fingerprints.
    • Magnetic Holders or Clamps: To temporarily hold the vinyl in place as you work.
    • Plastic Pry Tools: Used to tuck the vinyl into tight spaces, such as door panels and around edges.

    Materials You’ll Need:

    • Vinyl Wrap: Choose high-quality automotive-grade vinyl designed for long-lasting results. Brands like 3M, Avery Dennison, and VViViD are popular choices.
    • Surface Cleaner or Isopropyl Alcohol: Ensures the car’s surface is spotless, which is crucial for the vinyl to adhere properly.
    • Masking Tape: Used to mark off areas you don’t want to cover with the wrap.

    Having these tools and materials ready will ensure a smoother wrapping process, allowing you to focus on achieving the best results possible. Our DIY kits include all of the materials you’ll need to complete your project, so you won’t need to worry about purchasing separate materials. 

    Step-by-Step Guide To Wrapping Your Tesla

    Wrapping your Tesla may seem daunting at first, but by following a systematic process, you can achieve a professional finish. Below is a step-by-step guide to help you through the process.

    Step 1: Prepare Your Tesla

    Begin by cleaning your Tesla thoroughly to ensure a smooth and dust-free surface. Wash the car to remove dirt, grease, and debris, then follow up with a wipe-down using isopropyl alcohol or a specialized surface cleaner. This step is crucial because any leftover contaminants can create bubbles or imperfections in the vinyl. Next, remove any exterior components that might obstruct your wrapping process, such as side mirrors, badges, or door handles. These parts can be reinstalled after the wrap is complete. Finally, inspect the car's surface for scratches, dents, or chips. It’s essential to have a smooth and even surface for the vinyl to adhere properly.

    Step 2: Apply The Vinyl

    Position the vinyl over the panel you’re working on and secure it with magnetic holders or clamps to keep it in place. This will make it easier to maneuver the material as you apply it. Begin smoothing the vinyl onto the car’s surface using a squeegee, starting from the center and working your way outward. This technique will help eliminate air bubbles and ensure an even application. For curved areas, use a heat gun to soften the vinyl, making it more pliable and easier to mold around edges and corners. Once the vinyl is in place, use a precision knife to trim any excess material and a plastic pry tool to tuck the edges neatly into seams and crevices.

    Step 3: Final Adjustments

    After applying the vinyl, inspect your work carefully. Look for any remaining air bubbles, wrinkles, or imperfections. If you spot any, use the heat gun and squeegee to smooth them out. Once you’re satisfied with the application, reattach any parts you removed earlier, such as mirrors or badges. To allow the wrap to fully adhere, leave the car in a clean, temperature-controlled environment for at least 24 hours. This curing period is vital for ensuring the longevity and durability of the wrap.

    Pillar Delete for Model 3

    Benefits Of Wrapping Your Tesla Yourself

    Choosing to wrap your Tesla yourself offers a range of advantages that make it an appealing option for many car enthusiasts. Here are some key benefits:

    Cost Savings

    Professional vehicle wraps can cost anywhere from $2,000 to $5,000, depending on the installer’s expertise and the type of vinyl used. By taking the DIY route, you avoid high labor fees and only pay for materials and essential tools, which can save you thousands of dollars while achieving similar results.

    Creative Freedom

    DIY wrapping gives you complete control over the design and execution. You can choose unique colors, finishes (like matte, gloss, or satin), and even create custom patterns that reflect your personal style.

    Learning A New Skill

    Tackling a DIY Tesla wrap is not just about saving money but also gaining hands-on experience in a valuable skill. Once you’ve learned the process, you can use this knowledge to wrap other vehicles or assist friends and family with their customization projects, making it a potentially lucrative hobby.

    Non-Permanent Customization

    Vehicle wraps are temporary, making them perfect for Tesla owners who love variety. You can change the color or finish of your car whenever you want without affecting the original paintwork.

    Paint Protection

    Vinyl wraps don’t just make your Tesla look great; they also act as a protective shield for the original paint. They help guard against scratches, minor chips, and UV rays that can cause fading, ensuring your car’s finish remains pristine and maintaining its value over time.

    Common Mistakes To Avoid When Wrapping Your Tesla

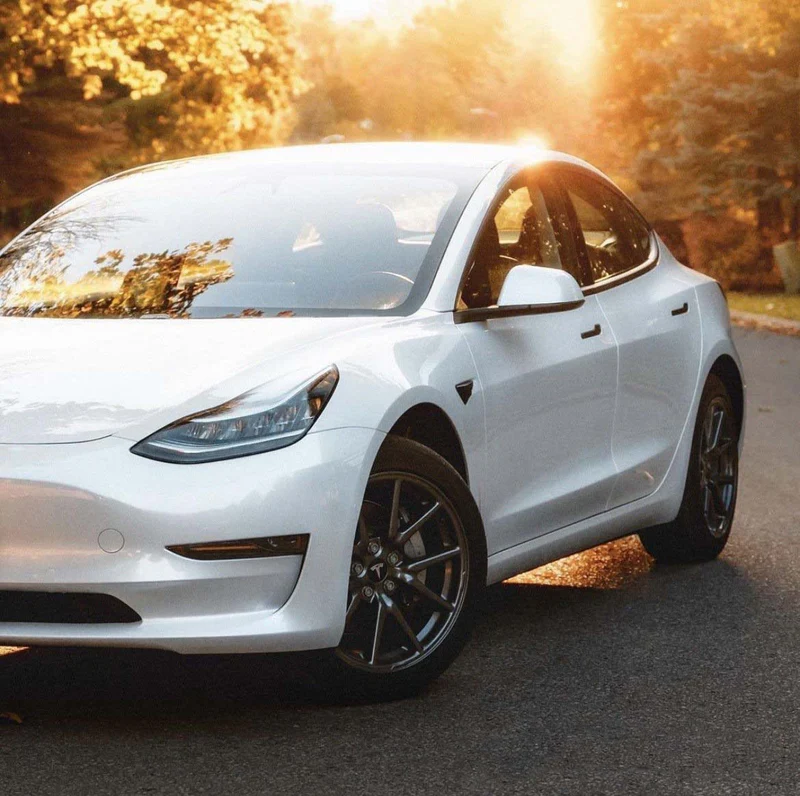
    Wrapping your Tesla is a rewarding DIY project, but it’s not without its challenges. Avoiding common mistakes can save you time, money, and frustration while ensuring a high-quality result. Here are some pitfalls to watch out for and how to avoid them.

    Skipping Surface Preparation

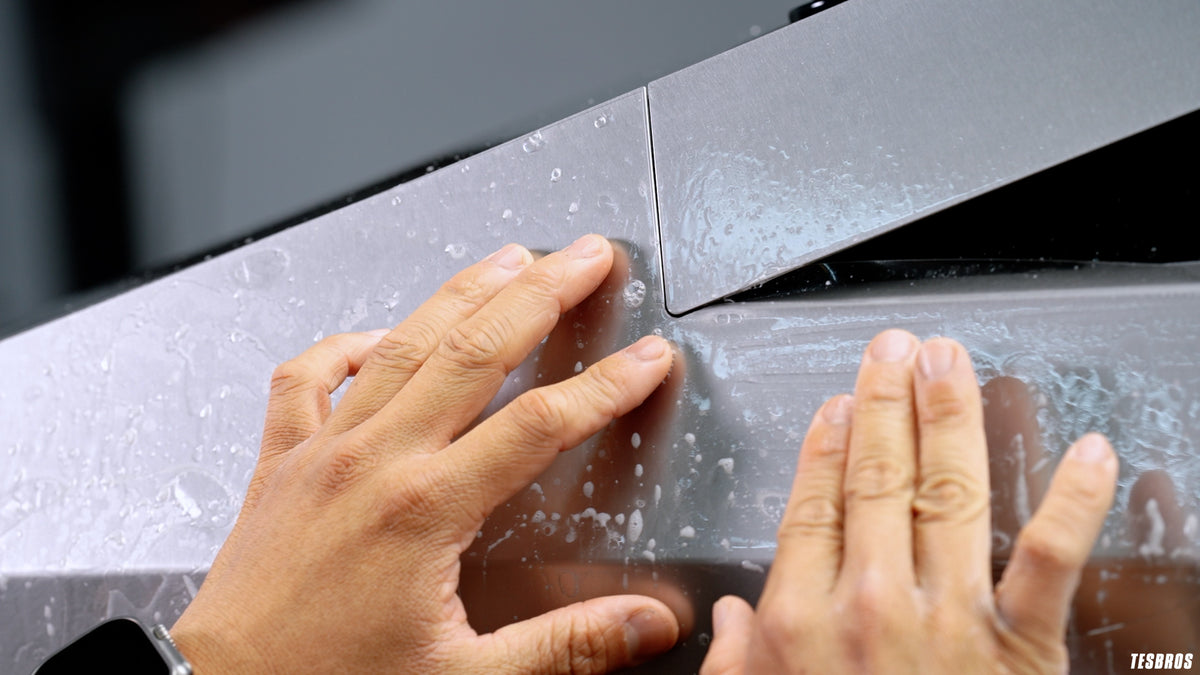
    One of the most frequent mistakes is failing to properly clean and prepare the car’s surface. Dust, dirt, or grease left behind can cause bubbles, wrinkles, and poor adhesion. Always wash your Tesla thoroughly and wipe it down with isopropyl alcohol or a specialized cleaner to remove contaminants before starting. Even tiny particles can affect the final look, so attention to detail here is crucial.

    Not Allowing Enough Time

    Rushing the process is another common mistake. Wrapping a Tesla, especially for beginners, can take several hours or even a full day. Hurrying can lead to errors such as misaligned vinyl, creases, or poorly trimmed edges. Take your time, work panel by panel, and focus on precision rather than speed. Patience is your best ally for achieving a smooth, professional finish.

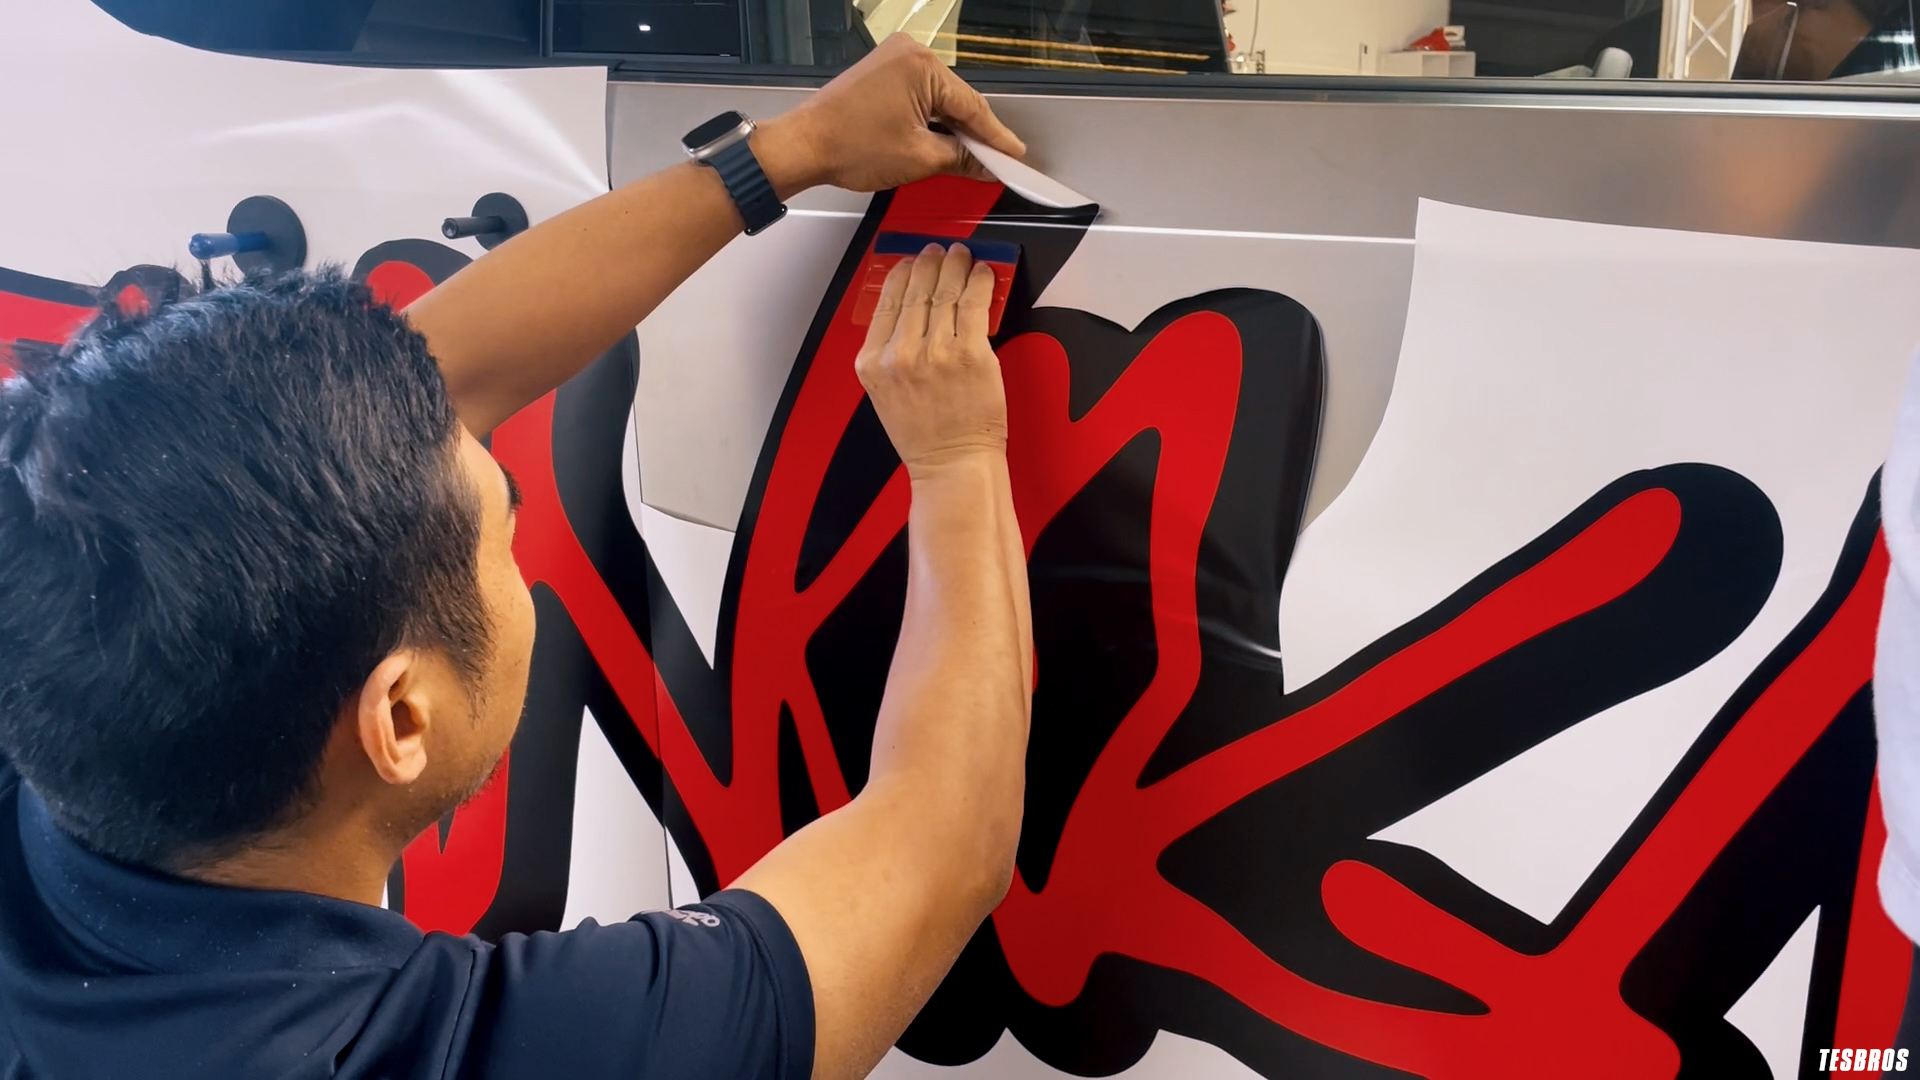
    Overstretching The Vinyl

    Vinyl is designed to be flexible, but overstretching it can weaken the material and lead to premature peeling or tearing. This is especially common when working on curved surfaces or tight corners. Use a heat gun sparingly to soften the vinyl and avoid pulling it excessively during application. Always let the material relax naturally before smoothing it down.

    Ignoring Air Bubbles And Wrinkles

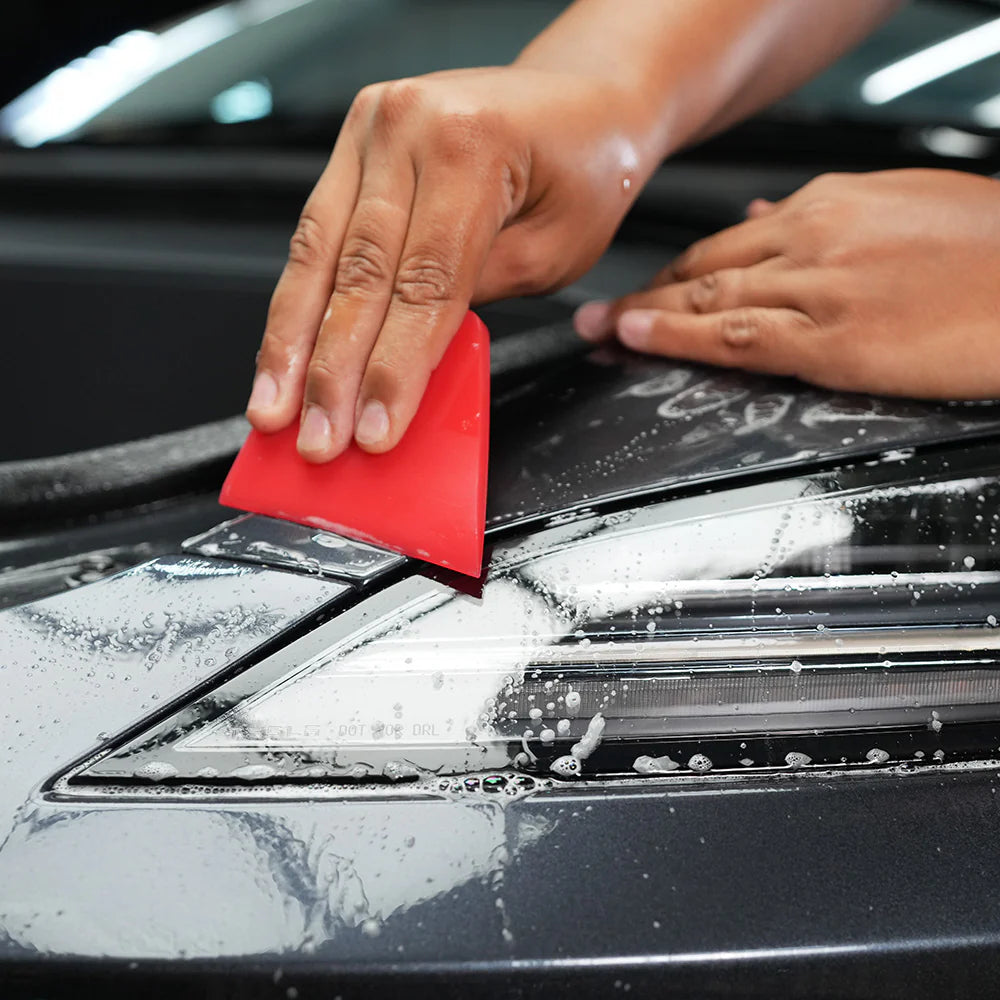
    Air bubbles and wrinkles are common issues that arise during vinyl application. While small bubbles can sometimes disappear over time, larger ones need immediate attention. Use a squeegee to smooth out bubbles as you go, working from the center toward the edges. For stubborn wrinkles, gently heat the area and reapply the vinyl.

    Forgetting About Environmental Factors

    Wrapping should always be done in a controlled environment. A garage or workshop with adequate lighting, minimal dust, and a stable temperature is ideal. Extreme temperatures, either too hot or too cold, can affect the vinyl’s adhesive properties and make application more difficult. Plan your workspace in advance to avoid these issues.

    Maintaining Your Tesla Wrap For Longevity

    Once you’ve successfully wrapped your Tesla, proper maintenance is essential to keep it looking pristine and to extend its lifespan. A vinyl wrap can last several years with the right care, so follow these tips to ensure your wrap stays in excellent condition.

    Regular Cleaning

    Cleaning your Tesla wrap regularly is crucial to prevent dirt, grime, and environmental contaminants from building up. Use a mild car shampoo and water to gently wash the surface. Avoid abrasive sponges or brushes, as they can scratch the vinyl. A microfiber cloth or soft mitt is ideal for cleaning without causing damage. Be sure to rinse thoroughly to remove soap residue.

    Avoid Harsh Chemicals

    Harsh chemicals, such as solvents, strong detergents, or abrasive cleaners, can deteriorate the vinyl and damage its finish. Always use cleaning products that are safe for vinyl wraps. If you’re unsure, test a small, inconspicuous area first before applying the product to the entire wrap.

    Protect Against UV Rays

    Prolonged exposure to the sun’s UV rays can cause fading or discoloration over time, especially for wraps with bright or vibrant colors. Whenever possible, park your Tesla in shaded areas or a garage to minimize sun exposure. Using a UV protectant spray specifically designed for vinyl can also help preserve the color and finish.

    Handle Stains Promptly

    Bird droppings, tree sap, and road tar can cause stains if left on the wrap for too long. Clean these off as soon as possible using a gentle cleaner and a soft cloth. For tougher spots, a specialized vinyl wrap cleaner is recommended to avoid damaging the material.

    Avoid High-Pressure Washing

    High-pressure car washes can peel or damage the edges of the wrap. It’s best to hand wash your Tesla to maintain the integrity of the vinyl. If you must use a pressure washer, keep the nozzle at least 12 inches away from the surface and use a low-pressure setting.

    Inspect For Damage Regularly

    Periodically inspect the wrap for any signs of lifting, peeling, or bubbling, especially around the edges and seams. Addressing small issues early can prevent them from becoming larger problems. You can usually reapply heat with a heat gun to smooth out minor lifting or bubbling.

    Waxing And Polishing

    Unlike paint, vinyl wraps do not require waxing or polishing. In fact, traditional waxes and polishes can damage the wrap’s finish. Instead, opt for a vinyl-specific finishing product to enhance the wrap’s appearance and add a layer of protection.

    Read also: 

    Yes, but it’s important to start small and practice on flat surfaces first. Watching tutorials and following detailed guides can help build your confidence before tackling more complex panels.

    A high-quality vinyl wrap, when applied correctly and maintained properly, can last anywhere from 3 to 7 years.

    No, as long as the paint is in good condition before wrapping. In fact, a vinyl wrap acts as a protective layer, shielding the paint from minor scratches and UV damage.

    Yes, removing a vinyl wrap is a straightforward process. Use a heat gun to soften the adhesive and carefully peel off the wrap without leaving residue.

    Wrapping your Tesla typically does not void the vehicle’s warranty. However, it’s always a good idea to check the terms of your specific warranty.

    Premium brands like 3M and Avery Dennison are popular choices for their durability, flexibility, and wide range of finishes.