Livraison gratuite sur les commandes américaines de 69 $ et plus

    Kit de protection complète du corps DIY pour modèle Y

    Protecteur d'écran en verre trempé (9H) pour modèle 3/Y

    Kit complet de suppression de chrome pour les modèles 3, S et X

    Ensemble furtif pour les modèles 3 et Y

    DIY Car Wrap Kit

    At TESBROS, we empower Tesla owners to customize, protect, and maintain their vehicles with ease. Our mission is to provide high-quality, DIY-friendly products that enhance your Tesla experience, all crafted with precision and care.

    DIY Car Wrap Kit

    Filter
    5 produits
    Meilleure vente
    Chrome Delete for Model S 2.0 - Gloss Black
    Chrome Delete for Model S 2.0 - Gloss Black
    Fits Does not fit May fit Check if this fits your Tesla
    Fits Does not fit May fit Check if this fits your Tesla
    plus 15% off with code NEWTESLA
    Fits Does not fit May fit Check if this fits your Tesla
     

    Key Takeaways:

    • Cost-effective customization: Discover how DIY car wrap kits let you transform your Tesla's appearance without breaking the bank.
    • Easy-to-follow guide: Step-by-step instructions and tips make wrapping your Tesla a manageable and rewarding DIY project.
    • Protect and personalize: Learn how vinyl wraps protect your Tesla’s paint while offering endless design options.

    What Is A DIY Car Wrap Kit?

    A DIY car wrap kit is a specialized package containing everything you need to apply a vinyl wrap to your vehicle, including pre-cut sheets of high-quality vinyl, tools like squeegees, and often a set of instructions or video tutorials. These kits are designed for car enthusiasts or anyone looking to personalize their vehicle without the need for professional installation.

    For Tesla owners, DIY car wrap kits are particularly appealing because they allow for a cost-effective and customizable way to change the appearance of their vehicles. Whether you want a sleek matte finish, a bold metallic look, or even a unique graphic design, these kits make it possible to achieve a professional-grade finish from the comfort of your own garage.

    TESBROS DIY Vinyl Wrap Kits: Customization And Protection For Tesla Vehicles

    Transform your Tesla into a personalized work of art with TESBROS DIY vinyl wrap kits. Designed for both style and protection, these kits offer a hassle-free way to customize your vehicle’s exterior and interior. Explore the options below:

    CyberReveal X-Ray Wrap Kit For The Cybertruck

    The CyberReveal X-Ray Wrap Kit For The Cybertruck transforms your Cybertruck into a mechanical masterpiece by showcasing a detailed rendering of its inner workings. Crafted with high-quality vinyl, the kit is designed for easy DIY installation, even for beginners. It includes all necessary tools and provides access to a comprehensive online video course to guide you through the process. The wrap not only offers a distinctive aesthetic but also serves as a protective layer for the vehicle's exterior.

    Complete Chrome Delete Kit for Model 3

    The Tesla Model 3 Chrome Delete Kit is designed to give your Model 3 a sleek, modern, and personalized appearance by eliminating the factory chrome accents. This kit is easy to install with a DIY peel-and-apply application, making it user-friendly for Tesla owners. It includes all necessary tools and detailed instructions to ensure a seamless installation process. Made from high-quality 3M 2080 automotive vinyl, the kit is built to last over five years, providing durability and a premium finish that withstands the elements.

    Avery Dennison DIY Full Body Vinyl Wrap For Cybertruck

    The Avery Dennison DIY Full Body Vinyl Wrap For Cybertruck enables Cybertruck owners to personalize their vehicle's exterior with a selection of bold and sleek colors. The high-quality Avery Dennison vinyl is designed to withstand harsh elements, providing both aesthetic enhancement and protection. The DIY application is facilitated by the vinyl's repositionable adhesive, allowing for a smooth, bubble-free finish. The wrap is rated to last up to five years but can extend up to ten years with proper maintenance.

    CyberReveal X-Ray Wrap Kit For The Cybertruck

    Benefits Of Using A DIY Car Wrap Kit For Tesla

    Using a DIY car wrap kit for your Tesla comes with several advantages that make it a popular choice for car owners looking for customization and cost-effectiveness. These benefits make it a viable and appealing option for Tesla enthusiasts.

    Cost Savings

    Professional car wrapping services can be expensive, often costing thousands of dollars depending on the design and material. A DIY car wrap kit allows you to achieve a similar professional-quality result for a fraction of the cost, giving you a budget-friendly option to personalize your Tesla without compromising quality.

    Customization Options

    DIY car wrap kits provide an array of choices, allowing you to select from a wide variety of colors, finishes, and patterns. Whether you envision a sleek glossy look, a sophisticated matte finish, or an eye-catching texture like carbon fiber or metallic chrome, these kits offer endless opportunities to reflect your unique style.

    Paint Protection

    A high-quality vinyl wrap acts as a protective shield for your Tesla’s original paint, safeguarding it against minor scratches, harmful UV rays, and road debris. This not only helps maintain the car's pristine appearance but also preserves its resale value by ensuring the paint remains intact and untouched.

    Temporary And Reversible

    One of the biggest advantages of a vinyl wrap is its temporary nature, making it ideal for those who love to experiment with different looks. If you ever want to restore your Tesla’s original paint or try a new design, the wrap can be removed without causing any damage to the car’s surface.

    Satisfaction Of DIY

    For individuals who enjoy hands-on projects, applying a car wrap can be a highly rewarding experience. The process allows you to take control of your Tesla's transformation, giving you a sense of accomplishment and a finished product that you can take pride in knowing you created yourself.

    How To Choose The Right DIY Car Wrap Kit For Your Tesla

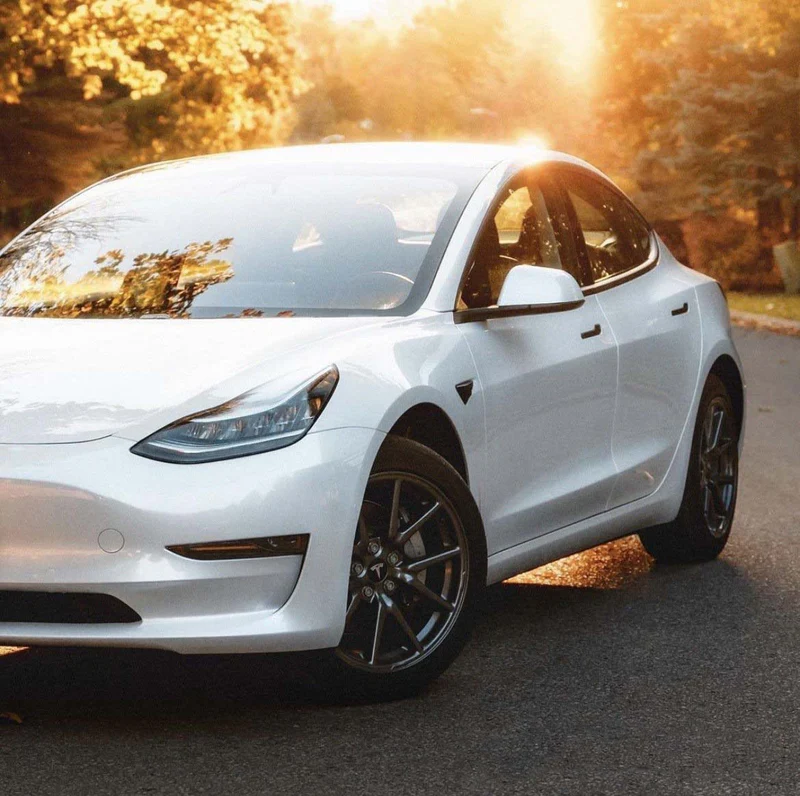
    Selecting the right DIY car wrap kit is crucial to achieving a flawless finish on your Tesla. By carefully considering these factors, you can ensure a smoother installation process and a professional-looking result.

    Material Quality

    Choose a kit that uses high-quality vinyl from trusted brands like 3M or Avery Dennison. Premium vinyl ensures durability and a longer lifespan and provides a smoother application process, reducing the risk of wrinkles and bubbles.

    Tesla-Specific Pre-Cut Designs

    For the best results, select a kit designed specifically for your Tesla model. These pre-cut designs are tailored to fit the unique curves and edges of Tesla vehicles, eliminating the need for tedious trimming and minimizing errors during installation.

    Color And Finish Options

    Consider the aesthetic you want to achieve for your Tesla when selecting a wrap kit. Whether you’re drawn to the sleek look of a glossy finish, the boldness of metallic shades, or the understated appeal of matte wraps, ensure the kit offers your desired finish and color options.

    Ease Of Application

    For first-time wrappers, ease of use is essential. Look for kits that come with clear instructions or video tutorials, and prioritize those that feature air-release technology, which helps to prevent bubbles and ensures a smooth application.

    Included Tools And Accessories

    Check that the kit comes with all the necessary tools, including a squeegee, gloves, and cleaning supplies. Some comprehensive kits, including TESBROS’ kit, also include surface preparation products to clean your car and improve vinyl adhesion.

    Warranty And Customer Support

    Select a kit from a reliable seller that provides a warranty for its product and responsive customer support. TESBROS’ customer support is invaluable. You can reach their excellent in-house support team, which can assist with any and all of your questions. This ensures peace of mind, allowing you to address any issues or defects during the installation process confidently.

    Step-By-Step Guide To Wrapping Your Tesla

    Wrapping your Tesla with a DIY car wrap kit is a detailed process that requires patience and precision. Follow this step-by-step guide to ensure a smooth and professional finish.

    Step 1: Gather Your Tools And Materials

    Before starting, make sure you have everything you need. Your DIY car wrap kit should include pre-cut vinyl sheets and a squeegee. Additional tools like a heat gun and cleaning supplies are essential for a seamless application. These tools will help you properly prepare the car and handle the vinyl during installation.

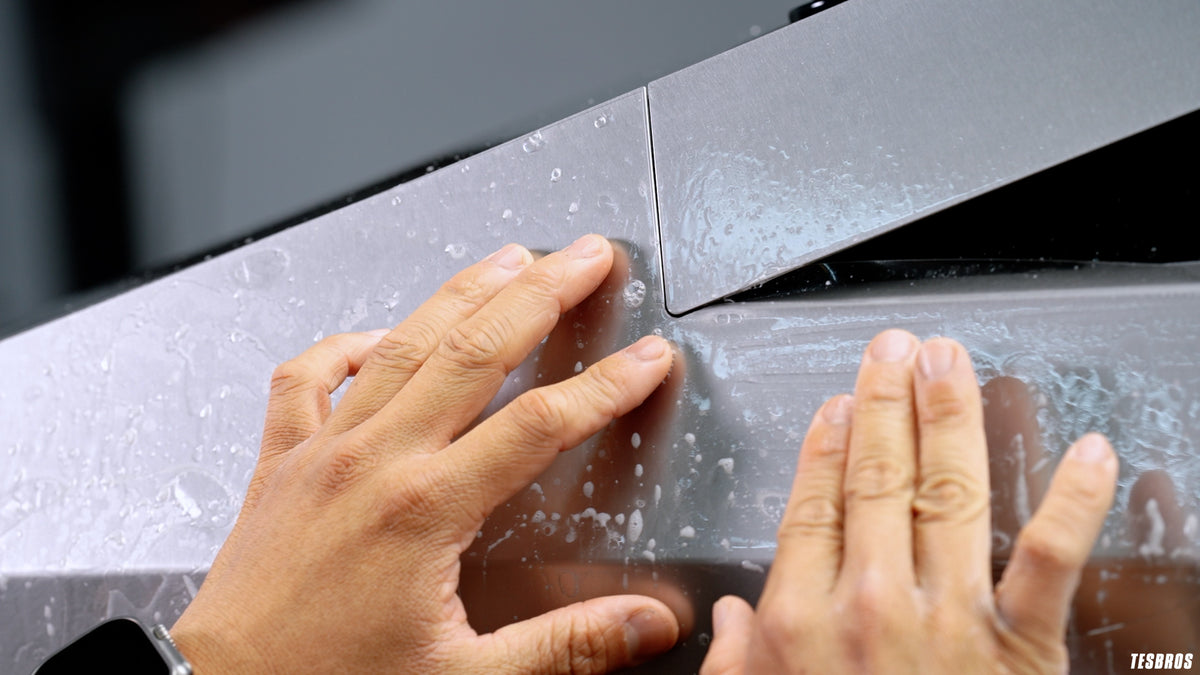
    Step 2: Prepare Your Tesla’s Surface

    Preparation is key to a successful wrap. Begin by thoroughly washing and drying your car to remove dirt, grease, or other contaminants. Follow this with an alcohol-based cleaner to eliminate any remaining wax or oils. A clean surface ensures that the vinyl adheres securely and prevents imperfections. Choose a clean, dust-free, and well-lit area to work in, as this minimizes the chances of debris getting trapped under the wrap.

    Step 3: Plan Your Installation

    Take time to familiarize yourself with the vinyl pieces in the kit. Lay them out near the car and identify where each piece will go. Starting with smaller, less complex sections, like side mirrors or door handles, can help you build confidence before tackling larger panels. This planning step will save time and reduce errors during the process.

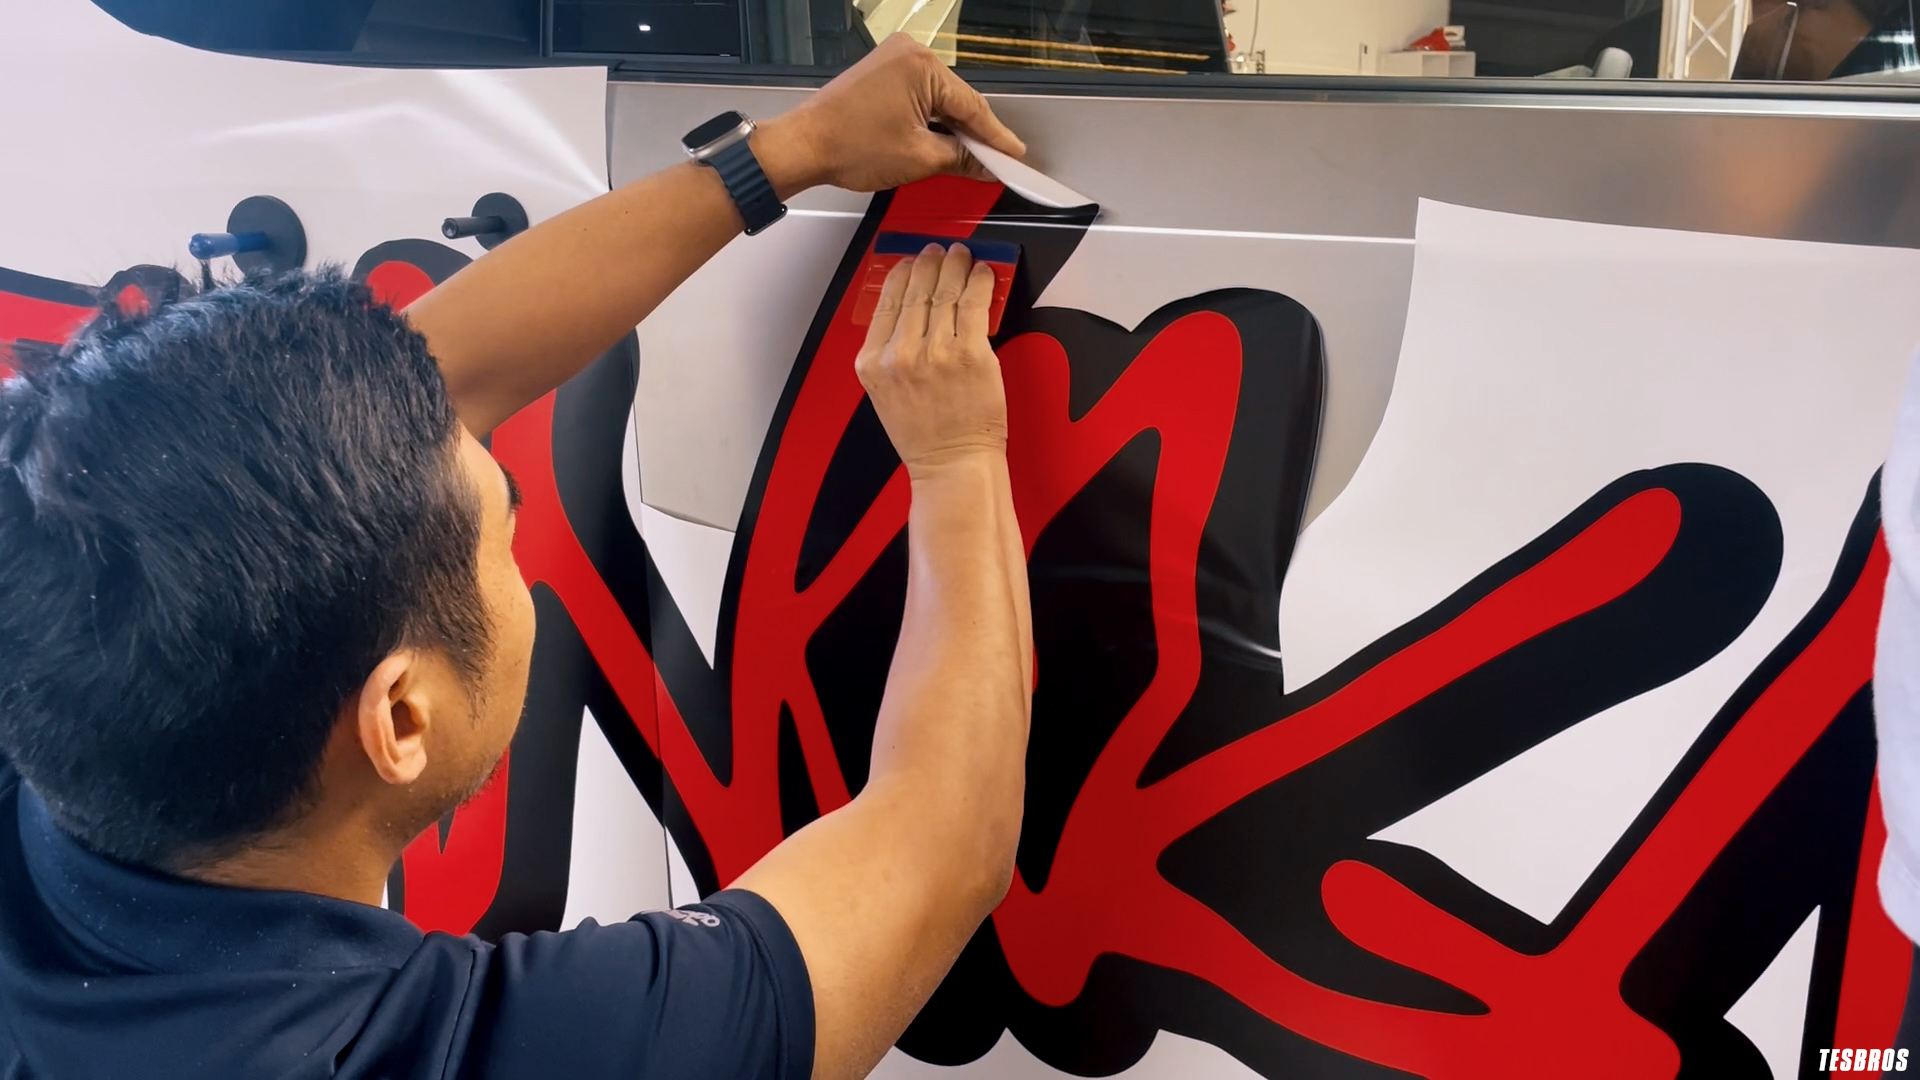
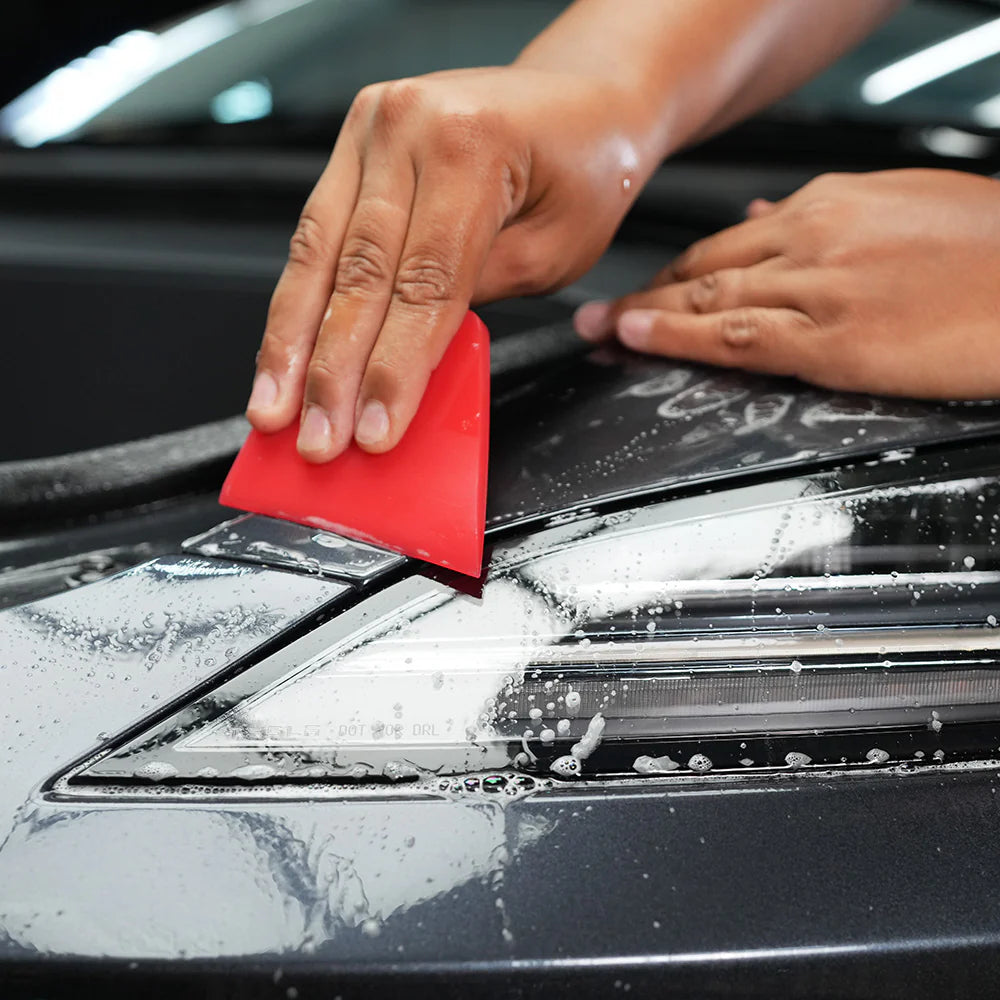
    Step 4: Apply The Vinyl

    Peel the backing off a small section of the vinyl to expose the adhesive. Carefully position the vinyl on the car, aligning it with the edges of the section you are wrapping. Use a squeegee to smooth out the vinyl, working from the center outward to remove air bubbles. For curved areas or edges, use a heat gun to soften the vinyl, making it more pliable and easier to conform to the surface.

    Step 5: Inspect And Adjust

    After the vinyl is in place, inspect your work for any remaining wrinkles or bubbles. Use the squeegee and heat gun to smooth out imperfections. If needed, reapply sections of the vinyl to achieve a better fit. Taking your time during this step ensures that the final result looks flawless.

    Step 6: Finish And Cure

    To secure the wrap, use the heat gun over the entire surface. This step activates the adhesive and ensures the vinyl sticks firmly to the car. Allow the wrap to cure for 24-48 hours before exposing the car to extreme weather conditions or washing it. This curing period is vital for the durability of the wrap.

    Maintenance Tips For Your Wrapped Tesla

    Maintaining a wrapped Tesla is essential to preserve the vinyl’s appearance and extend its lifespan. Proper care ensures that your car continues to look stunning while protecting the original paint underneath. Here are some key maintenance tips to follow:

    Regular Washing

    Wash your Tesla regularly to prevent dirt, dust, and grime from building up on the wrap. Use a soft sponge or microfiber cloth and a gentle, wrap-safe car wash soap. Avoid abrasive scrubbers that can scratch or damage the vinyl surface. Rinse thoroughly with clean water to remove any residue.

    Avoid Harsh Chemicals

    When cleaning your wrapped Tesla, steer clear of harsh chemicals, solvents, or petroleum-based cleaners, as these can degrade the vinyl. Stick to products specifically designed for vinyl wraps or mild detergents that won’t harm the material.

    Protect Against UV Exposure

    Although vinyl wraps are designed to withstand sun exposure, prolonged UV rays can cause fading or discoloration over time. Whenever possible, park your Tesla in a shaded area or use a car cover to protect the wrap. This is especially important if you live in a region with intense sunlight.

    Handle Stains Promptly

    If you notice bird droppings, tree sap, or other stains on the wrap, clean them off immediately. Use a soft cloth and a waterless wash to gently remove the stain. Allowing these substances to sit on the wrap can lead to staining or damage.

    Be Cautious With Pressure Washing

    While it’s safe to pressure wash a wrapped Tesla, you must do so with caution. Keep the nozzle at least 12 inches away from the surface and avoid directing high-pressure water at edges or seams, as this can lift the vinyl. Use a lower-pressure setting and focus on gentle cleaning.

    Inspect And Repair

    Over time, minor wear and tear may occur on the wrap, such as lifting edges or small tears. Regularly inspect your Tesla for any issues and address them promptly. Many DIY kits include repair materials, or you can contact a professional for touch-ups.

    Read also: 

    Yes, a DIY car wrap kit is specifically designed for beginners and includes tools and instructions to make the process accessible. Start with smaller sections to build confidence before moving to larger panels.

    Wrapping a Tesla can take anywhere from 10 to 20 hours depending on your experience level and the complexity of the wrap. It’s best to allocate plenty of time and not rush the process.

    A DIY car wrap kit typically costs between $300 and $1,000, depending on the brand and design, whereas professional installation can range from $2,000 to $5,000 or more.

    Yes, one of the benefits of vinyl wraps is that they’re temporary and removable. If you don’t like the outcome, you can carefully remove the wrap and try again or switch to a new design.

    No, applying a car wrap won’t void the Tesla warranty. However, make sure to remove the wrap properly if needed to avoid damage to the paint, as improper removal could affect claims for paint-related warranties.

    Most vinyl wraps are not biodegradable, but they can protect your Tesla’s paint, reducing the need for repainting, which has a higher environmental impact. Additionally, some brands are exploring eco-friendly vinyl options.