


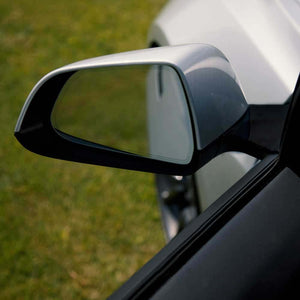
ミラービニールラップ(ミラー1枚につき2セット)
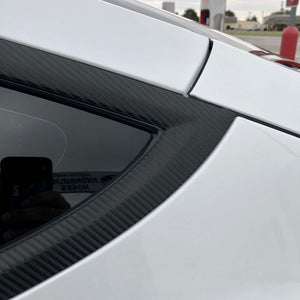
トリム専用ビニールピース
エンブレムカバービニール
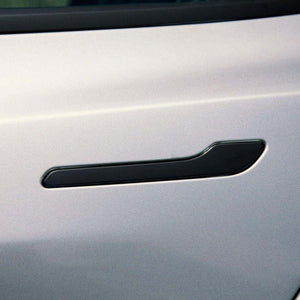
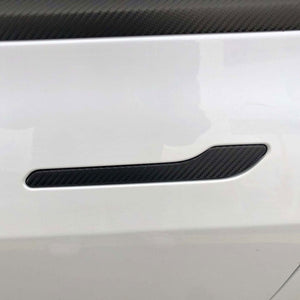
ドアハンドルビニールラップ
オートパイロットカメラビニール
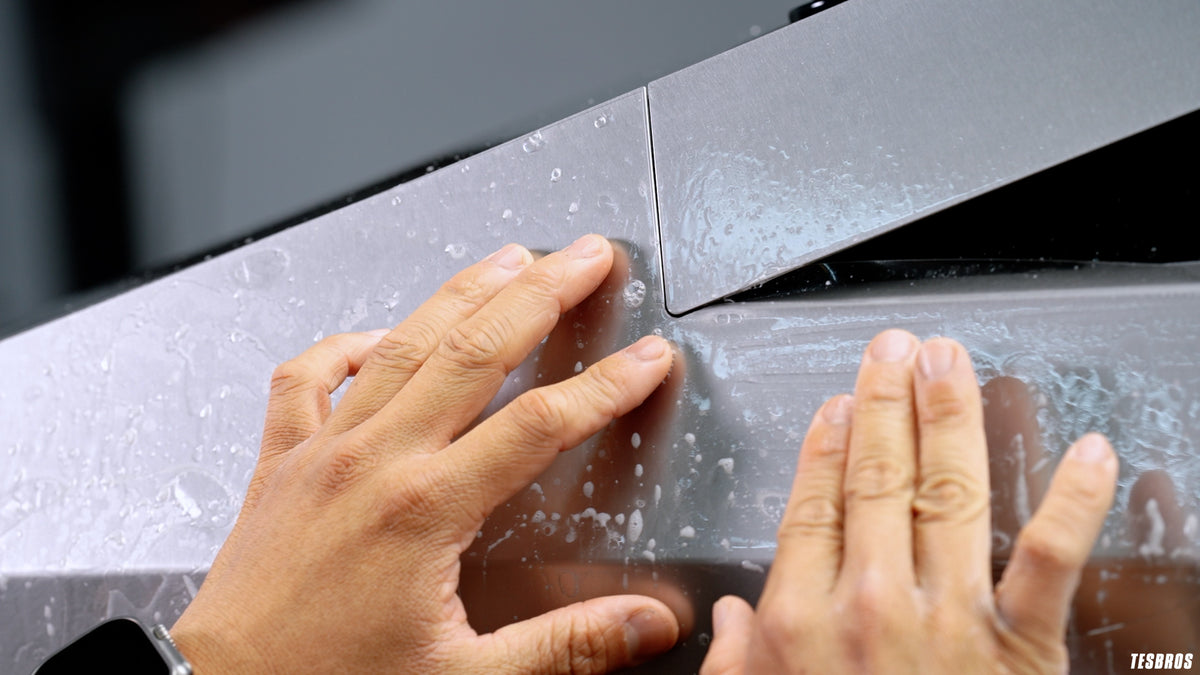
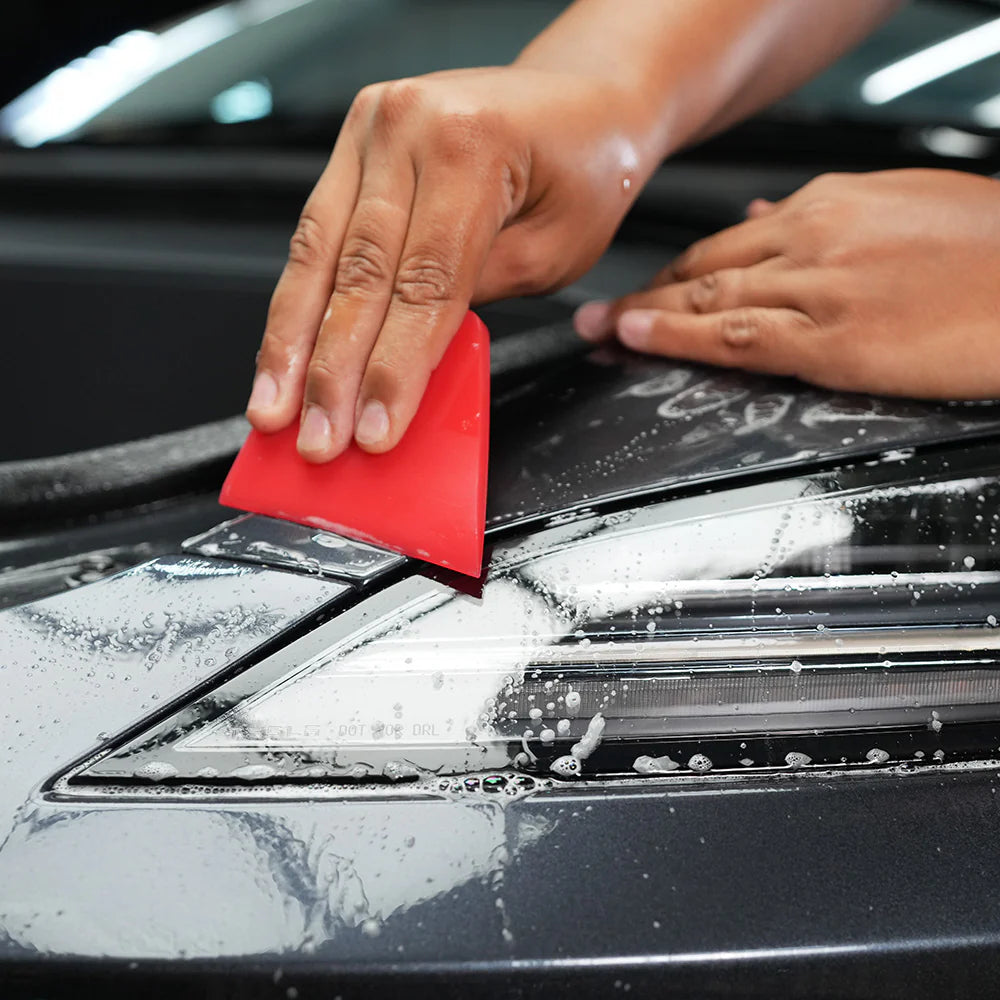
塗布用スクイジーセット
詳細なビデオインストールガイド
- | / 最大 % 割引 % 節約 最大節約 を節約 販売 完売 在庫あり

.svg?v=144615871337664008991737747827)


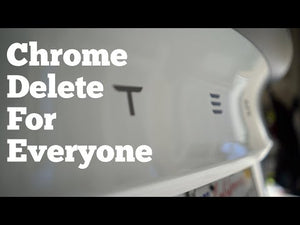
包括的なDIYクロームデリートキットで、Tesla Model 3の外観を一新しましょう。クロームをブラックアウトしたり、トリム、ロゴ、ドアハンドルなどの色を変更したりするのに最適で、最新のModel 3の洗練されたデザインにマッチします。
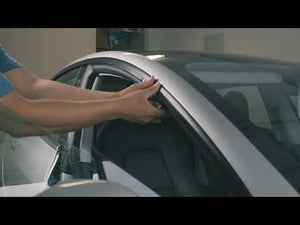
ほとんどのお客様はこのキットを自分で取り付けます。ビニールラップの取り付け経験があると役に立ちますが、必須ではありません。
取り付け時間: 4時間
推奨温度: 65°F – 75°F
必要なツール:ヒートガン/ヘアドライヤーを推奨しますが、必須ではありません。
いいえ、全く問題ありません。ラップキットを使えば、分解することなくプロ並みのラップを施すことができます。
よほど伸ばしすぎていない限り、通常の伸び状態に戻すことができます。ビニールは形状記憶加工が施されているため、熱を加えるだけで元の状態に戻ります。ヒートガンやヘアドライヤーを使い、熱を当てたい部分に当て続けると、縮むのが分かります。縮まないのが分からない場合は、熱を加えすぎた可能性がありますので、予備の生地を使う必要があります。
ヒートガンやヘアドライヤーも使えますが、伸ばしたり、形を整えたりするのにヒートガンを使うことをお勧めします。熱を加える際は、一箇所に留まらず、ヒートガンを約15cmほど離して動かし続けてください。
キットには必要なものがすべて揃っていますが、加熱源は含まれていません。必要に応じてヒートガンやヘアドライヤーのご使用をお勧めします。
当社のDIYキットは初心者の方にも安心してお使いいただけます。キットの取り付けに特別な知識は必要ありませんが、キットを最大限に活用していただくために、動画をご覧いただき、ビニールシートについてご理解いただくことをお勧めします。
テスラは手洗いのみをお勧めします。自動洗車機はブラシレスのため、素材を分解するために強力な化学薬品を使用する傾向があり、ビニールシートに悪影響を与える可能性があります。
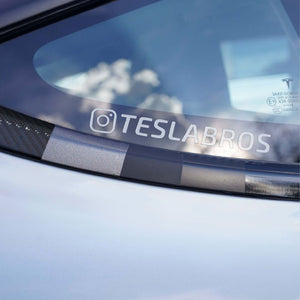
@teslabros
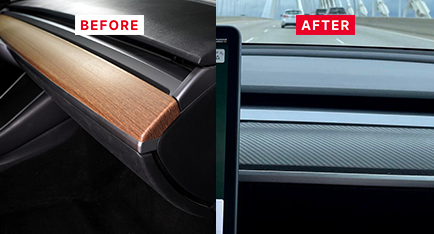
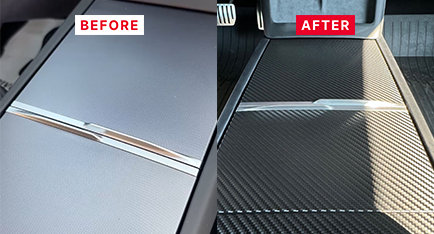
取り付けも簡単で、見た目もエレガントに変身しました。木目調のダッシュボードはあまり好きではありませんでしたが、カーボンファイバーのダッシュラップでダッシュボードの見た目が一変し、スポーティでありながら高級感のあるインテリアに仕上がりました。強くお勧めします!
ドミニク
アメリカ合衆国
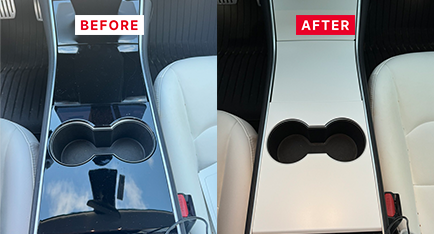
4年も所有していたセンターコンソールを、ついにラッピングすることにしました。指紋や埃がつきやすいピアノブラックとはおさらば。サテンホワイトに、こんにちは!
ケイラー
アメリカ合衆国
素材がとても柔らかく、何度も持ち上げたり位置を変えたりして完璧に仕上げることができたので、とても簡単でした。迷っているなら、とにかくやってみて下さい!動画で各ステップを丁寧に説明してもらったので、完成品にとても満足しています。到着も2日で届きました。
リチャード
アメリカ合衆国
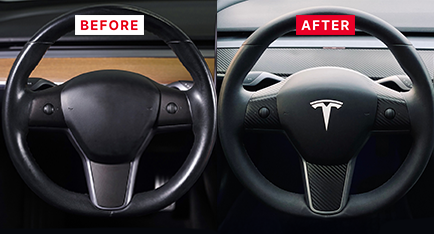
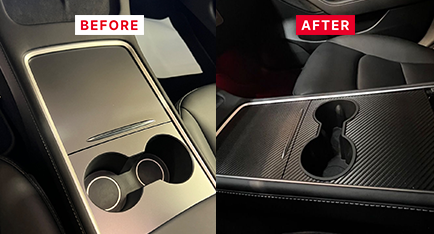
見た目は素晴らしく、アップグレードも簡単です。純正のステアリングホイールは少し地味です。ダッシュボードとセンターコンソールのキットも追加したので、それに合わせてブラックカーボンファイバーバージョンを取り付けました。見た目も最高です!精密にカットされたパーツと付属の工具で、取り付けも簡単です!
ブライアン
アメリカ合衆国
配送が早く、ラップの品質も良く、取り付けも簡単。カーボンファイバーラップは超おすすめです!
クリステル
アメリカ合衆国
カット済みビニールラップ
必要なツールがすべて含まれています

ステップバイステップのインストールガイド
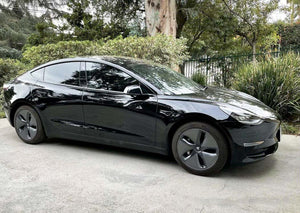
This kit did the job of modernizing my 2018 Model 3 with new satin black trim. Time will tell how the vinyl holds up over time, but with many edges tucked behind the trim and proper maintenance I see this lasting for years. While the end result is great, you must be prepared for hours of tedious work to achieve it. The full application took me a total of ~8 hours over two sessions. Make sure to watch the installation videos TESBROS provides, and if you're trying to decide between satin black and matte black like I was I recommend the satin black (as pictured). The slight sheen is very nice and OEM-like, I prefer this look even with matte black wheel covers. Overall the kit is great but only if you know you'll have the time and energy to set aside for the application and an environment conducive to installing vinyl. I found here in AZ it was best to install the kit in the evenings so the vinyl wouldn't stretch too much from the daytime heat. I'd also recommend black wheel covers to complete the chrome delete look.
The Good:
*Looks very nice from a far everywhere generally.
*Has lasted through couple car washes.
*Material works well to conform to the shapes.
The not so good:
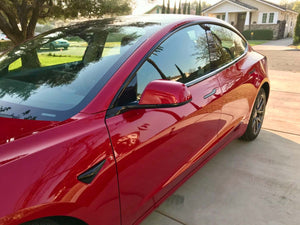
*The order in which the vinyl goes down for the mirror trim, needs to some changing. The overlaps in some areas need to be re ordered to prevent separation as I've experience on both sides of the vehicle.
*Around the edges of the mirror, the vinyl seems to peel a little, but hasn't progress. These are thin pieces.
Overall Notes:
*Be prepared to do this chrome delete in several sessions.
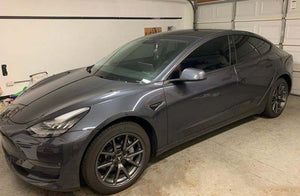
This is a great kit and the instructional videos help even beginners do a good job. Take your time and prep well. If you can, try and breakup the install in sections, it will get tiring. I went with the satin black and when done right it's indistinguishable from the newer trim. Side repeaters, mirrors, and corner trim can be tricky, but the rest is a breeze.
Everything was labeled and directions were clear. Easy to apply. We love the way it looks!!
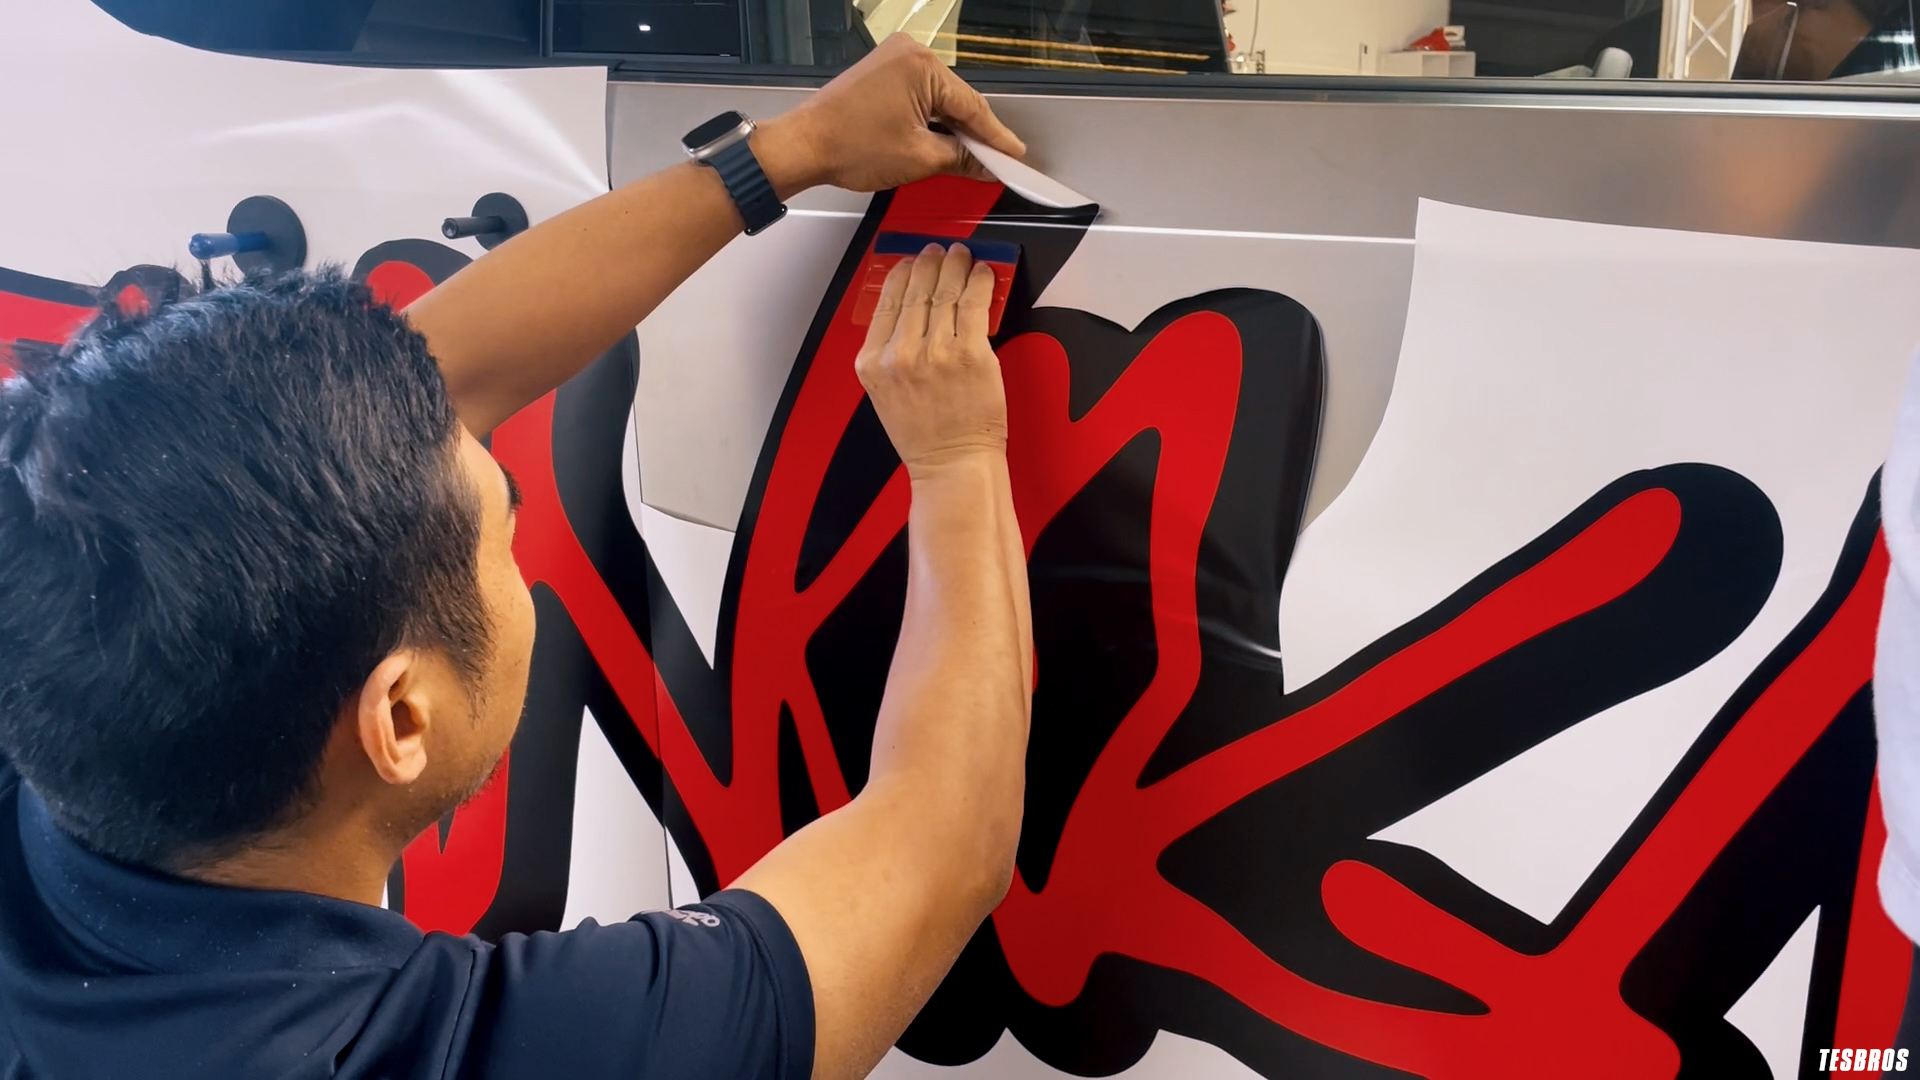
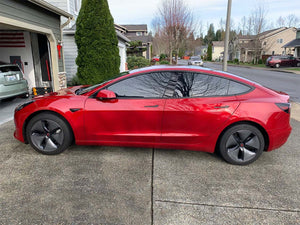
Absolutely love how my Model 3 looks with tint + this chrome delete kit. Always wanted the red/black look so I’m glad I finally pulled the trigger on it.
Install can be a little tricky, so just take your time and stick to the instructional videos. My install isn’t perfect, you can see imperfections if you get up really close, but it still looks great as you can see!

100%満足保証

99ドル以上のご注文は迅速かつ無料で配送いたします