


- Mirror Vinyl Wrap (2 sets)
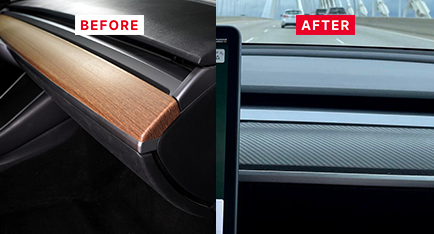
- Custom Trim Vinyl
- Emblem Covering Vinyl
- Door Handle Vinyl Wraps
- Autopilot Camera Vinyl
- Front Section Vinyl Kit
- Rear Applique Vinyl
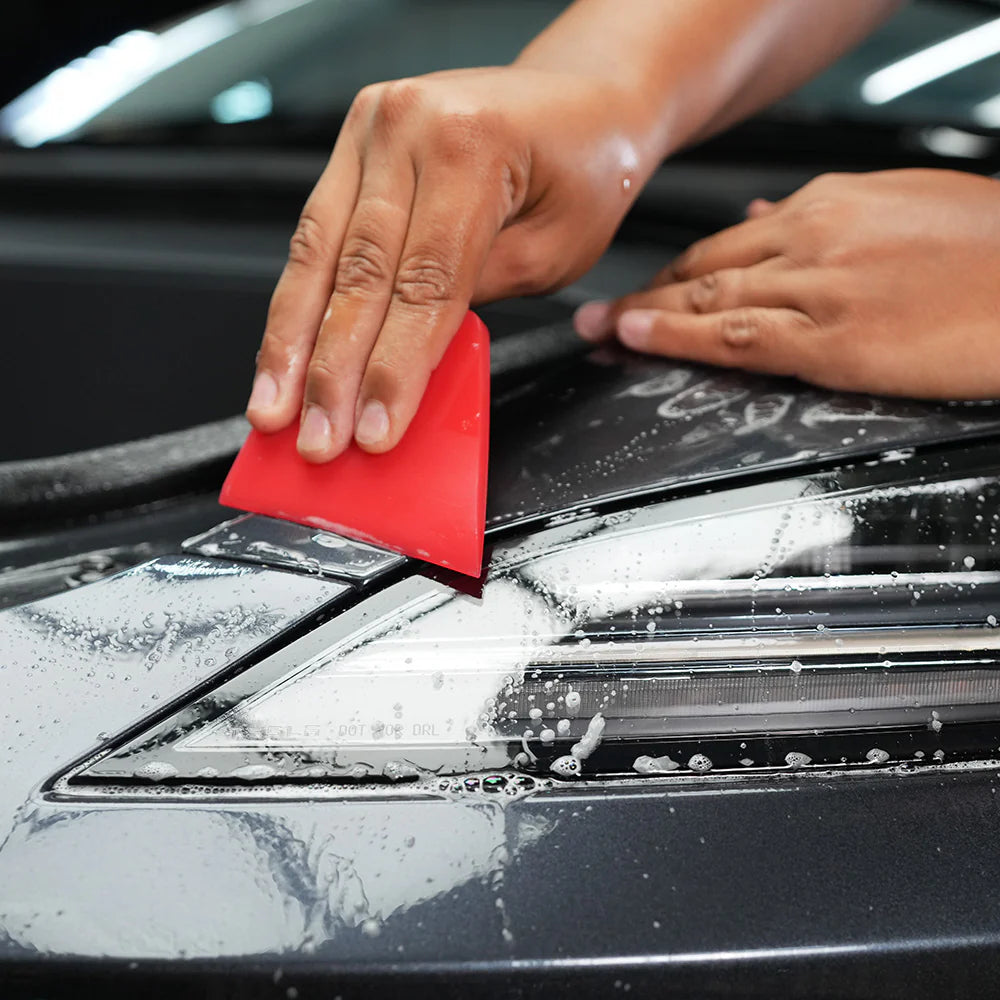
- Squeegee Set for Application
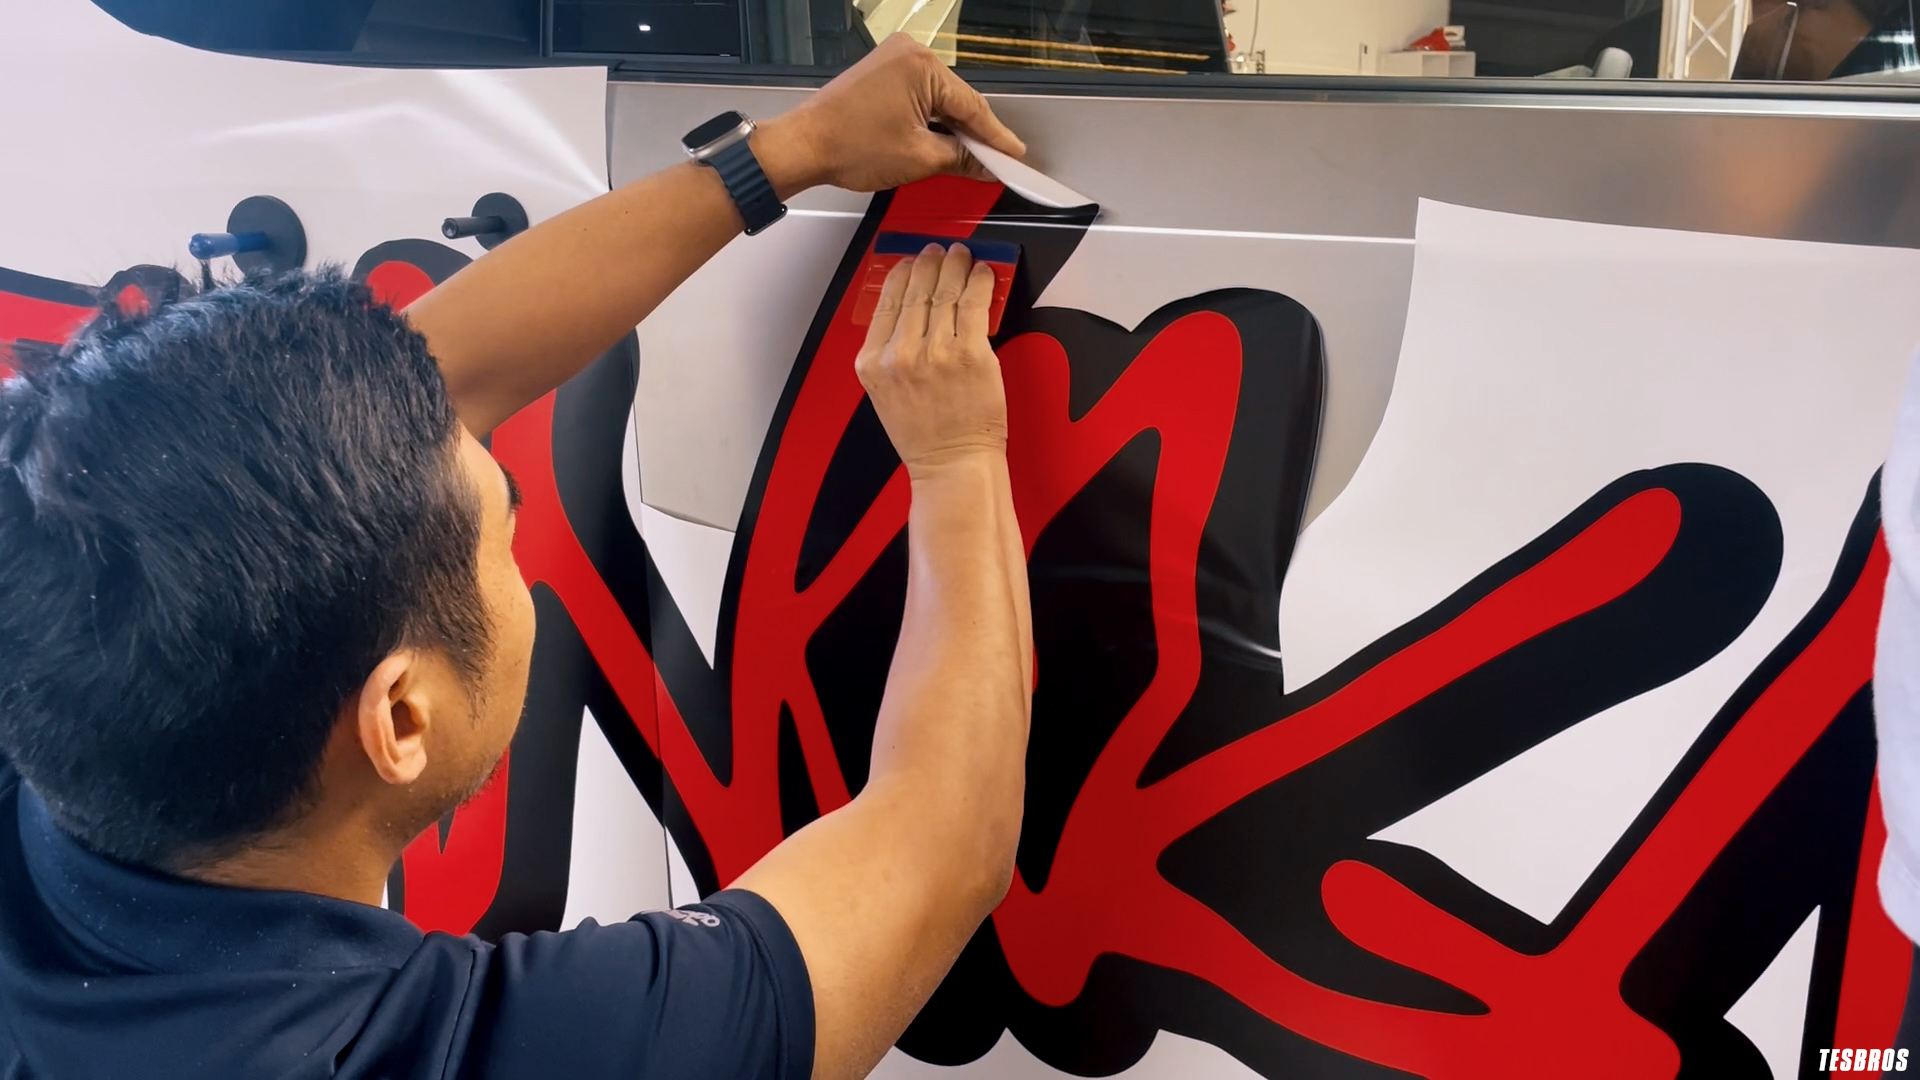
- Detailed Video Installation Guide
- | / Save up to % Save % Save up to Save Sale Sold out In stock
Free Continental U.S. Shipping $99+
Model X 用の完全な Chrome 削除キット
Sale
- Easy Install
- Lasting Quality
- Made in USA


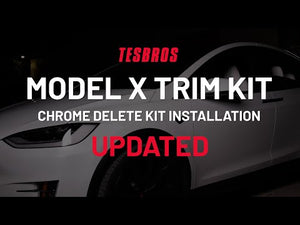
Model X 用の完全な Chrome 削除キット
Sale
- Easy Install
- Lasting Quality
- Made in USA
¥26,100 JPY¥29,000 JPY

.svg?v=144615871337664008991737747827)


クロームトリム、ロゴ、ハンドルなどをブラックアウトして、新しい Model X のように見せます。
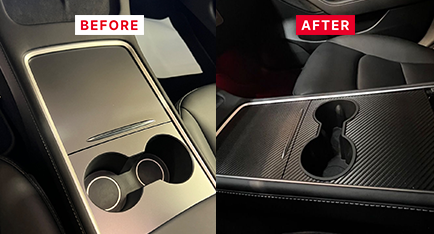
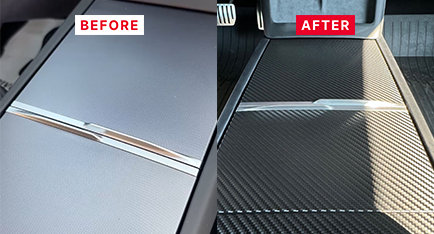
当社の DIY クロム削除キットには、クロム部分をブラックアウトするために必要なものがすべて付属しています。すべてのトリム、ミラー、フロント キット、リア アップリケ、自動操縦カメラ、ハンドル、ロゴの部品が含まれています。さらに、失敗に備えて2セット付属しています。
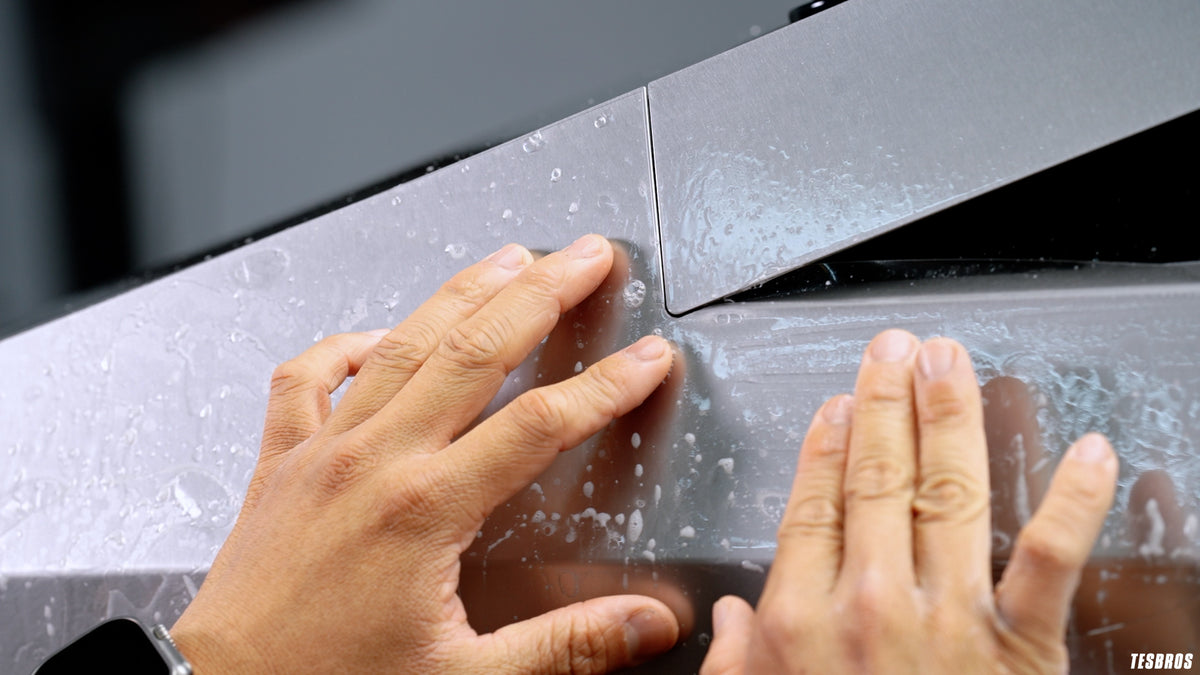
- 簡単な DIY 剥がして貼り付けるアプリケーション (下記を参照)
- ツールと説明書が付属
- 5年以上持続します
- 米国で設計および製造
含まれるもの:
- ミラーキット
- トリムキット
- エンブレムビニール
- ドアハンドルビニール
- オートパイロットビニール
- フロントキット
- 後部アップリケ
- スキージセット
- インストールガイド
仕様:
- 道路の過酷な環境にも耐えられるよう、高級 3M 2080 自動車用ビニールで作られています。
- 2016 2020 テスラ モデル X に適合
ほとんどのお客様はこのキットを自分で取り付けます。ビニールラップの取り付け経験があると役に立ちますが、必須ではありません。
取り付け時間: 4時間
推奨温度: 65°F – 75°F
必要なツール:ヒートガン/ヘアドライヤーを推奨しますが、必須ではありません。
Do I have to disassemble parts of the car to apply the wrap?
No, not at all. The wrap kit allows you to apply a professionally looking wrap without disassembly.
I overstretched the vinyl. What can I do?
Unless you REALLY overstretched it, you can get it back to normal stretch. Vinyl is memory-based so if you just heat it, it will revert back to its original state. Use a heat gun or hairdryer and keep your heat moving in the area. You’ll see it shrink back. If you don’t see that it is shrinking back, you may have added too much heat and will have to use your extra piece.
How do I use a heat gun when applying vinyl?
You can use a heat gun or a hairdryer but you want to use a heat gun whenever you need to stretch or conform around awkward areas. When using heat, don’t stay in one area. Keep your gun moving and roughly 6 inches away.
Does it come with everything I need to install?
The kit comes with everything you need, except a heating source. We recommend using a heat gun or even a hairdryer if needed.
Do I need any experience?
Our DIY kits are designed with beginners in mind. You do not need prior knowledge to install these kits, however, we do recommend studying our videos and familiarizing yourself with vinyl to get the most out of your kit!
Can I go through and automatic car wash?
It’s recommended to only hand wash your Tesla. Due to automatic carwashes being brushless, they tend to use heavy chemicals to break things down which can be harmful to the vinyl.
ビニール/PPF の生涯保証:当社のキットに問題がありますか?代替品をお送りいたします。送料を負担するだけです。お問い合わせ先: support@tesbros.com
@teslabros
See How 17K+ Tesla Owners Transformed Their Rides
Easy to install and elegant transformation. I wasn’t a big fan of the wood grain dash. The carbon fiber dash wrap completely transformed the look of the dash making it look more like a sporty yet luxurious interior. Highly recommend!
Dominique
united states
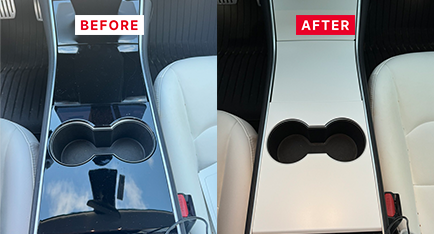
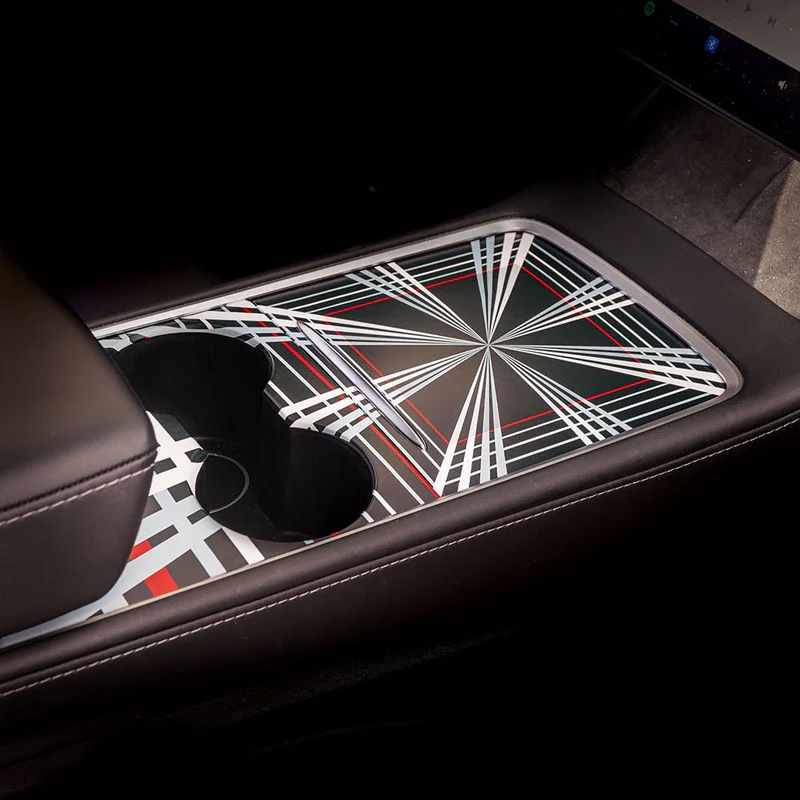
Finally decided to wrap my center console after 4 years of ownership. Bye bye to piano black, finger print & dust magnet. Hello, satin white!
Kaylor
united states
Super easy bc the material is very forgiving allowing me to lift and reposition multiple times until it was perfect. If you’re trying to decide, just do it! Videos provided walked me through each step so I love the final product. Arrived in two days too.
Richard
united states
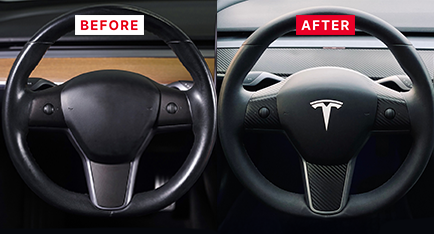
Great looking, simple upgrade.The OEM steering wheel is a bit plain. I installed the black carbon fiber version of this kit to match the dash and center console kits I also added. Looks great! Piece of cake to install with the precisely cut pieces and included tools!
Brian
united states
Quick delivery, great quality wraps and easy to install. Highly recommend the carbon fiber wrap!
Christel
united states
What’s Included In The Kit
Your Pre-Cut Vinyl Wraps
All Required Tools Included

Step-by-Step Installation Guide
Hear From Our Community
Total 5 star reviews: 63 Total 4 star reviews: 10 Total 3 star reviews: 2 Total 2 star reviews: 2 Total 1 star reviews: 1
94%would recommend this product
Slide 1 selected
78 reviews
- MCMister C.Verified Buyer4 days agoRated 5 out of 5 starsGreat all the way around
I must admit i was a bit skeptical to buy at first but so glad that I did. I bought the Chrome delete kit for my Model X In it turned out to be More than everything that I Imagined. The video guide was Very easy to follow step by step Though it took me a little longer than I Expected But I would definitely Blame Me For that. I also want to mention that I accidentally Tour one of the pieces So I could not install along my door And I reached out To the company And within a week They sent me out A replacement piece No charge This experience was All Around great and I'm very happy with the outcome. I definitely recommend. Thanks guys
- JMJacob M.Verified Buyer2 weeks agoRated 5 out of 5 starsGreat material , pretty easy pre cuts could be a bit bigger for front bumper , other then that ease install
Great nd easy to work with also great customer service !!
- EMElvis M.Verified Buyer9 months agoRated 5 out of 5 starsFAST FAST SHIPPING!
Couldn’t be happier with the satin black chrome delete I ordered for my white Model X. Product is easy to use and looks amazing.
- JCJoy C.Verified Buyer9 months agoRated 5 out of 5 starsMust buy for chrome delete!
Product was easy to use and application takes patience! The price was right & it was super cool that you could order extra pieces if you needed to. Trust the process, follow the video instructions, and in the end it will pay off! I basically have a “new car” 🙂
- IGIngrid g.Verified Buyer11 months agoRated 5 out of 5 starsRefresh your own Model X
Okay, so chrome delete won't make your model X newer, but it will pretend to be! The kit is pretty easy to install and the videos are super helpful. Take your time on the mirrors though, they are tricky.
I didn't do the front t logo area because I have a carbon piece inbound but it came out great
Recommended For You

100% Satisfaction Guarantee

Fast & Free Shipping for orders $99+