Black Friday Deals Are Here! Up to 30% Off | Code: WattaBargain SHOP NOW

    Complete Chrome Delete Kit for Models 3, S, & X

    Stealth Bundle for Model 3 & Y

    DIY フロントプロテクションキット - モデル 3 用 PPF

    Best Seller

    DIY フロントプロテクションキット - モデル 3 用 PPF

    Best Seller
    スタイル: センサーカットアウト付き (2017-2022)

    Free Continental U.S. Shipping $99+

    Installation Level: Intermediate

    Installation Intermediate

    Free Video Guides

    All Tools Included

    USA Support
    PRICE MATCH GUARANTEE Found a better price? Let us know and we'll match it!
    Match It

    注: 米国本土以外からのご注文には、配送制限により 70% イソプロピル アルコールは付属しません。米国からの注文は陸送でのみ発送できます。

    テスラの最も脆弱な部分を石、傷、昆虫から保護します。

    当社の DIY フロント保護キットには、ビデオ コースや専門家によるサポートなど、テスラを風雨から守るために必要なものがすべて付属しており、必要なすべてのサポートを得ることができます。

    私たちは、プロによるインストールの問題点をすべて取り除き、それらを排除するか、誰でも簡単にできるようにしました。また、インストール経験から最良であると判断したすべてのツールも含まれています。今すぐ入手して、PPF について語り始めましょう!

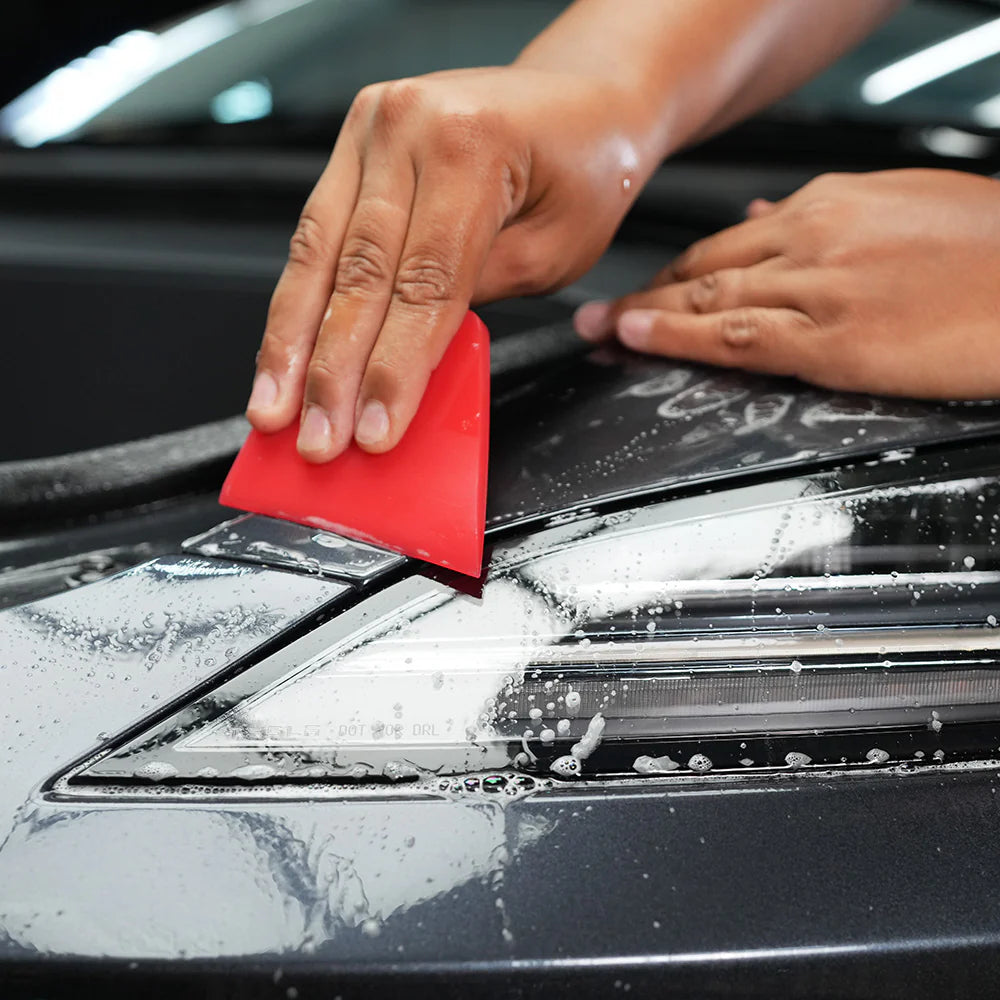
    • DIY 剥がして貼るアプリケーション
    • 提供されるツールとオンラインコース
    • 10年持続
    • 米国で設計および製造

    含まれるもの:

    • フロントバンパーPPF
    • フードPPF
    • フェンダーPPF
    • ヘッドライト/フォグランプ PPF
    • ミラーPPF
    • プレミアムスリップボトル
    • プレミアムタックボトル
    • スキージ5点セット
    • 70% イソプロピルアルコール
    • マイクロファイバータオル5枚
    • 1×ウォッシュミット
    • TESBROS 洗車シャンプー
    • TESBROS プレップウォッシュ
    • 粘土バー
    • ニトリル手袋 1 組
    • スリップソリューションパケット
    • 電子ステップバイステップ インストール コース

    仕様:

    • エイブリー・スプリーム・ディフェンス PPF
    • 2017 年以降の Tesla Model 3 に適合

    注意: テスラは最近、すべてのモデル 3 とモデル Y に超音波センサーが搭載されなくなり、「テスラ ビジョン」システムが搭載されると発表しました。

    あなたの Tesla に超音波センサーが装備されているかどうかを確認するには、下の画像を確認してください。

    配送前に当社のキットを購入し、お使いの Tesla にセンサーが搭載されていない場合は、無料で交換品を入手できるよう、 support@tesbros.comまでメールでお問い合わせください。

    車のフロントまたはリアバンパーに6つの丸いセンサーがある場合は、「センサーカットアウトあり」を選択してください。

    車のフロントまたはリアバンパーのどこにも丸いセンサーがない場合は、オプションとして「センサーカットアウトなし」を選択してください。

    これができるかどうか考えていますか?私たちのキットは初心者を念頭に置いて設計されています。初めて PPF をインストールする場合は、ここをクリックして仕組みを確認してください。

    オンラインコース:

    最初のステップは、DIY PPF キットを正常にインストールするために必要なすべての情報が含まれるオンライン コースにアクセスすることです。
    アクセスコースはこちら

    注: 購入後、電子メールでコースに無料でアクセスできます。

    この PPF は光沢仕上げですか、それともステルス (マット) 仕上げですか?

    現在はグロス仕上げのみですが、近日中にステルス(マット)仕上げもリリースする予定です。このリリースの更新情報と通知を受け取るには、以下からサインアップしてください。

    セラミックコーティングの上にPPFを施工できますか?

    残念ながら、PPF はセラミックコーティングには接着しません。すでにセラミックコートを施してある場合は施工をお勧めしません。

    ラップを貼るには車の部品を分解する必要がありますか?

    全くない!当社のキットは、何も外したりナイフを使用したりすることなく、車にフィットするように慎重に設計されています。

    このキットの返品ポリシーは何ですか?

    私たちは、人々の考えが変わることを理解しています。弊社のキットでは、小さなピースでお試しいただける「お試しキット」をご用意しております。気に入らない場合は、他に何も開封していない限り、キット全体を返品して全額返金してもらえます。

    PPFはどのくらい持続しますか?

    10年の耐久性を誇るAvery Supreme Defense PPFを使用しています。時間が経ってもフィルムが黄ばんだりひび割れたりすることはありません。

    PPF に関する事前の経験は必要ですか?

    いいえ!私たちはこのキットを平均的なジョー向けに設計しました。学習を進める上で必要なすべてが含まれています。

    インストールにはどのくらい時間がかかりますか?

    人によって異なりますが、一人でインストールする場合は 8 ~ 12 時間かかると予想されます。

    あなたのキットと他の PPF キットの違いは何ですか?

    インストールプロセスを段階的に説明する詳細なコースが含まれています。他のキットでは PPF の事前知識が必要ですが、当社のキットは完全に初心者向けです。

    PPFの上にセラミックコーティングを施すことはできますか?

    絶対に。車をさらに簡単にきれいに保つことができる、PPF 専用のセラミック コーティングが多数あります。

    この商品は返品不可です。
    5.0
    Rated 5.0 out of 5 stars
    Based on 54 reviews
    Total 5 star reviews: 52 Total 4 star reviews: 2 Total 3 star reviews: 0 Total 2 star reviews: 0 Total 1 star reviews: 0
    100%would recommend this product
    Slide 1 selected
    54 reviews
    • A
      Anonymous
      Flag of United States
      Verified Buyer
      10 months ago
      Rated 4 out of 5 stars
      DIY PPF

      Overall this is a well put together kit and the instructional videos were very helpful. Patience is key as it will take several hours to get a quality result.

    • R
      Ryan
      1 year ago
      Rated 5 out of 5 stars
      Great Investment

      I couldn’t be more pleased with how the finished product looks. You won’t find a better DIY kit. Since I had no previous experience I watched the videos twice, it still took me several hours to complete, but looks better than I expected. Seal edges well to avoid dirt entering while driving after. I used a larger table and brought an extra light in the garage. I only had my wife help with larger bumper pieces, but it can be done by yourself. The fender and bumper seams were the most challenging part, but if you take your time you won’t see them! I did have a few bubbles when I was done, but all but 1 or 2 went away within a week. The others are easily fixed. My car was only 2 weeks old, but I still did the entire prep routine and that helped. I had to do many pieces a 2nd or 3rd time due to dirt or not being perfect, just spray your slip solution and start over. Tips: spray plenty of slip when peeling film and take your time - larger pieces are a challenger. 2) remember to always push away from Tack areas and squeegee all moisture out. It will take patience, but it’s so worth it, I feel so much more comfortable driving now. Thanks Tesbros for an awesome product (use Facebook page, Ji is awesome!) Picture shows completed mirror and a couple hood bubbles that went away.

    • S
      Scott
      Flag of United States
      Verified Buyer
      1 year ago
      Rated 5 out of 5 stars
      Easy install, 10/10 tutorial training courses and guides from Tesbros ( 2023 Model 3 )

      9.8/10 installation for a DIY kit. I even did this outside because I have no garage (Very Early morning, non-windy day, 50- 67 degree F outdoor temp), AND all by my self. It came out pretty much perfect.

      I have had some experience in vinyl wrapping of my previous car (roof and interior trims). I will say PPF is WAY easier because it is a wet installation so don't be intimidated.

      My advice is to watch the Tesbro Video Guides before.

      -0.2 points because I do wish the front bumper/fender did not have any seams and just came in one PFF piece.. , But at the end of the day this was probably a better idea for noobs since it would be a lot more difficult to install a single sheet, which requires stretching of the PPF material.

      Some tips while installing:

      1. Make sure you thoroughly squeegee all parts of the film to get out all the air bubbles. Even though I was slow and methodical when squeegeeing, I thought everything came out perfectly, except a small bubble in the front bumper corner areas. There was couple slip solution bubbles which I happen to miss. But it's so small, no one will ever notice except me... :( lol

      2. If you get any specs of dust, simply use the slip spray bottle to wash out from underneath the film. I recommend not to wear (polyester shirts) NO cotton shirts or pants during install which could potential shed cotton lint. .

      3. Make sure you take your time and "sew" the seams right up against each other. This is probably the main advice I would give.…


    • A
      Anonymous
      Flag of United States
      Verified Buyer
      1 year ago
      Rated 5 out of 5 stars
      Model 3 Full frontal PPF kit

      Video instructions really make a world of difference when installing the PPF. The kit is well put together and I would recommend it to anyone considering PPF on their Tesla.

    • AA
      Ali Al H.
      Flag of United States
      Verified Buyer
      1 year ago
      Rated 5 out of 5 stars
      Overall this kit is a budget DIY protection that saved me $1100

      I was not sure to buy this kit then I decided to pull the triger and get it. My local ppf shop asked for $600 to install the front bumper only and $1650 for full front. I get this kit for about $680 with sales deal 😍 👌. It save me money, the local shop asked to drop the car for 4 days at thier shop that will add extra uber cost to me like $100.

      I watched tesbros YouTube videos like 2-3 times and then when I started installing I was following the steps and YouTube like watch each part for each piece before starting then I start installing one piece at a time, this will help to minimize errors. I spent 4 hours prep my car and 12 -14 hours including watching time to installing it. I wash the car on Friday night and start working on it on full Saturday and Sunday.

      Tips:

      Get 3 Glallon on distilled water before starting

      Get big table or 2 tables sit next to each other

      Get Ramp to raise the car ( it will give you better access to the lower bumper)

      Get someone to help you, my wife was a great help to me

      Get big light and tourch light too

      Clean the space well

      Challenging

      The kit designed to have seam lines I understand why they did it because I can't imagine how to installing it without them as it will require more stretch and professional level. However, butt seam eadges is taking time and effort to make it looks good but not easy.

      I found some hair dirt inside the film in some areas which cannot removed. These hair dirt was not mine it was some contaminated…

    Reviews LoadedReviews Added
    PRICE MATCH GUARANTEE Found a better price? Let us know and we'll match it!
    Match It