Yes, PPF can be removed, but it requires careful handling. Use heat (like a hair dryer) to soften the adhesive, and slowly peel the film away to avoid damaging the car’s paint. If adhesive residue remains, clean it with an alcohol-based cleaner.
Free Shipping for US Continental Orders $99+
Shop by Location
Paint Protection Film (PPF) has revolutionized the way we protect our vehicles from everyday damage. By acting as a shield against scratches, chips, and stains, PPF has become a must-have for preserving the pristine condition of your car. But why rely on costly professionals when you can achieve the same results at home? With the right tools, knowledge, and guidance, DIY PPF is more accessible than ever.
Paint Protection Film (PPF) is a transparent, durable layer of polyurethane or polymer material applied to a vehicle's exterior surfaces. It acts as a shield, protecting your car's paint from minor scratches, chips, stains, and UV damage. PPF is particularly popular among car enthusiasts who want to preserve the pristine appearance of their vehicles.
The importance of PPF lies in its ability to extend the life of your car’s paint, maintain its resale value, and save on potential repair costs caused by everyday wear and tear. Unlike traditional wax or ceramic coatings, PPF provides a physical barrier, making it ideal for resisting impacts like stone chips and abrasions.
Avery Dennison's Paint Protection Film (PPF) is a premium solution designed to safeguard your vehicle's paintwork from everyday hazards such as stone chips, bug splatters, and minor abrasions. This thermoplastic urethane film is renowned for its durability and self-healing properties, ensuring your car maintains its pristine appearance over time.
Benefits of Choosing TESBROS' Avery Dennison PPF Kits:
For Tesla owners looking to combine protection with personalization, TESBROS provides a variety of Avery Dennison vinyl wraps in multiple finishes, including gloss, matte, satin, and specialty options. These wraps not only protect the paint but also allow for unique customization to reflect individual style.
Installing paint protection film (PPF) requires the right tools to ensure a smooth, bubble-free application. TESBROS’ Installation Tool Kits take the guesswork out of gathering supplies by providing everything you need in one convenient package. The Installation Tool Kit for Cybertruck is designed for precision, featuring a sprayer, squeegee, and utility knife to make the process as straightforward as possible. Similarly, the Model 3/Y DIY Installation Tool Kit includes all the essentials for a seamless application, making it the perfect companion for TESBROS’ pre-cut PPF kits.
Below, we’ll break down some tools needed for a successful DIY installation included in our kits, ensuring your Tesla stays protected with a professional-grade finish.
Essential Tools
Optional Tools
Preparation Materials
With these tools and materials provided in TESBROS' Installation Tool Kits, you'll have everything needed for a seamless DIY PPF installation. The Installation Tool Kit for Cybertruck includes a high-quality sprayer, precision squeegee, and a utility knife designed to help you achieve smooth, bubble-free application across your vehicle’s surfaces.
For Model Y owners, the Model 3/Y DIY Installation Tool Kit provides the same essential tools tailored specifically for pre-cut PPF kits, ensuring an easy and professional-looking finish. TESBROS' kits eliminate the hassle of sourcing individual tools, giving you everything required for a successful and frustration-free installation.
Proper maintenance of your Paint Protection Film (PPF) is essential to ensure it provides maximum protection and retains its appearance over time. Here’s how to care for your PPF effectively:
Frequent washing helps keep your PPF clean and free from dirt, debris, and road grime. Use a mild, pH-balanced car shampoo and a soft microfiber cloth or sponge to avoid scratching the surface. Avoid harsh detergents or abrasive materials that could damage the film.
While PPF is designed to be durable, high-pressure washers can lift the edges of the film or cause it to peel over time. If you use a pressure washer, maintain a safe distance and avoid directing the stream at the edges of the film.
Some cleaning products, such as waxes and sealants, may not be compatible with PPF and can leave a residue or discoloration. Use products specifically labeled as PPF-safe or check with the film manufacturer’s recommendations.
Although many PPF products come with UV resistance, prolonged exposure to direct sunlight can still lead to discoloration or degradation over time. Whenever possible, park your car in shaded areas or use a car cover to reduce UV exposure.
If you notice small scratches or lifting edges, address them promptly to prevent the damage from spreading. Many PPF products are self-healing, meaning light scratches can disappear with exposure to heat or sunlight. For more significant issues, consider using a heat gun carefully or consulting a professional for repairs.
Regularly check your PPF for signs of wear, lifting, or bubbling. Early detection of problems allows you to take corrective action before they worsen.
Refrain from using ammonia-based cleaners, solvents, or other harsh chemicals on your PPF. These substances can degrade the film’s surface and compromise its protective properties.
Installing PPF yourself can be a rewarding experience if done methodically. Follow these steps for a smooth application:
Start by thoroughly washing your car to remove any dirt, dust, or grease that could interfere with the PPF’s adhesion. Use a standard car soap followed by an alcohol-based cleaner to ensure the surface is spotless. For a perfectly smooth finish, use a clay bar to eliminate any embedded contaminants. After cleaning, dry the surface completely, as moisture can compromise the film’s application.
Prepare a soapy application solution by filling a spray bottle with water and adding a few drops of baby shampoo or a specialized PPF solution. Generously spray the solution onto the car's surface where the film will be applied. This allows the film to slide smoothly, making it easier to adjust and position before final placement.
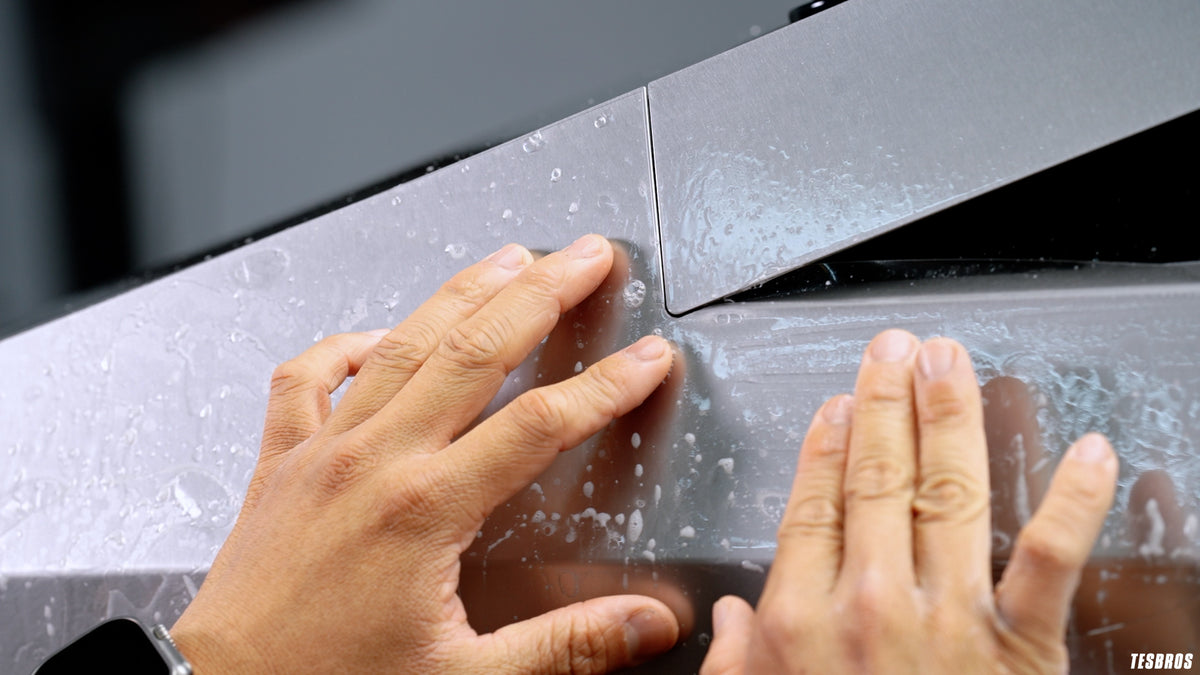
Carefully peel off the backing from the PPF to expose the adhesive side. Be cautious to avoid touching the adhesive with your hands to keep it clean. Place the film onto the wet surface, adjusting its position as needed. The soapy solution helps prevent the film from sticking prematurely, giving you time to align it correctly.
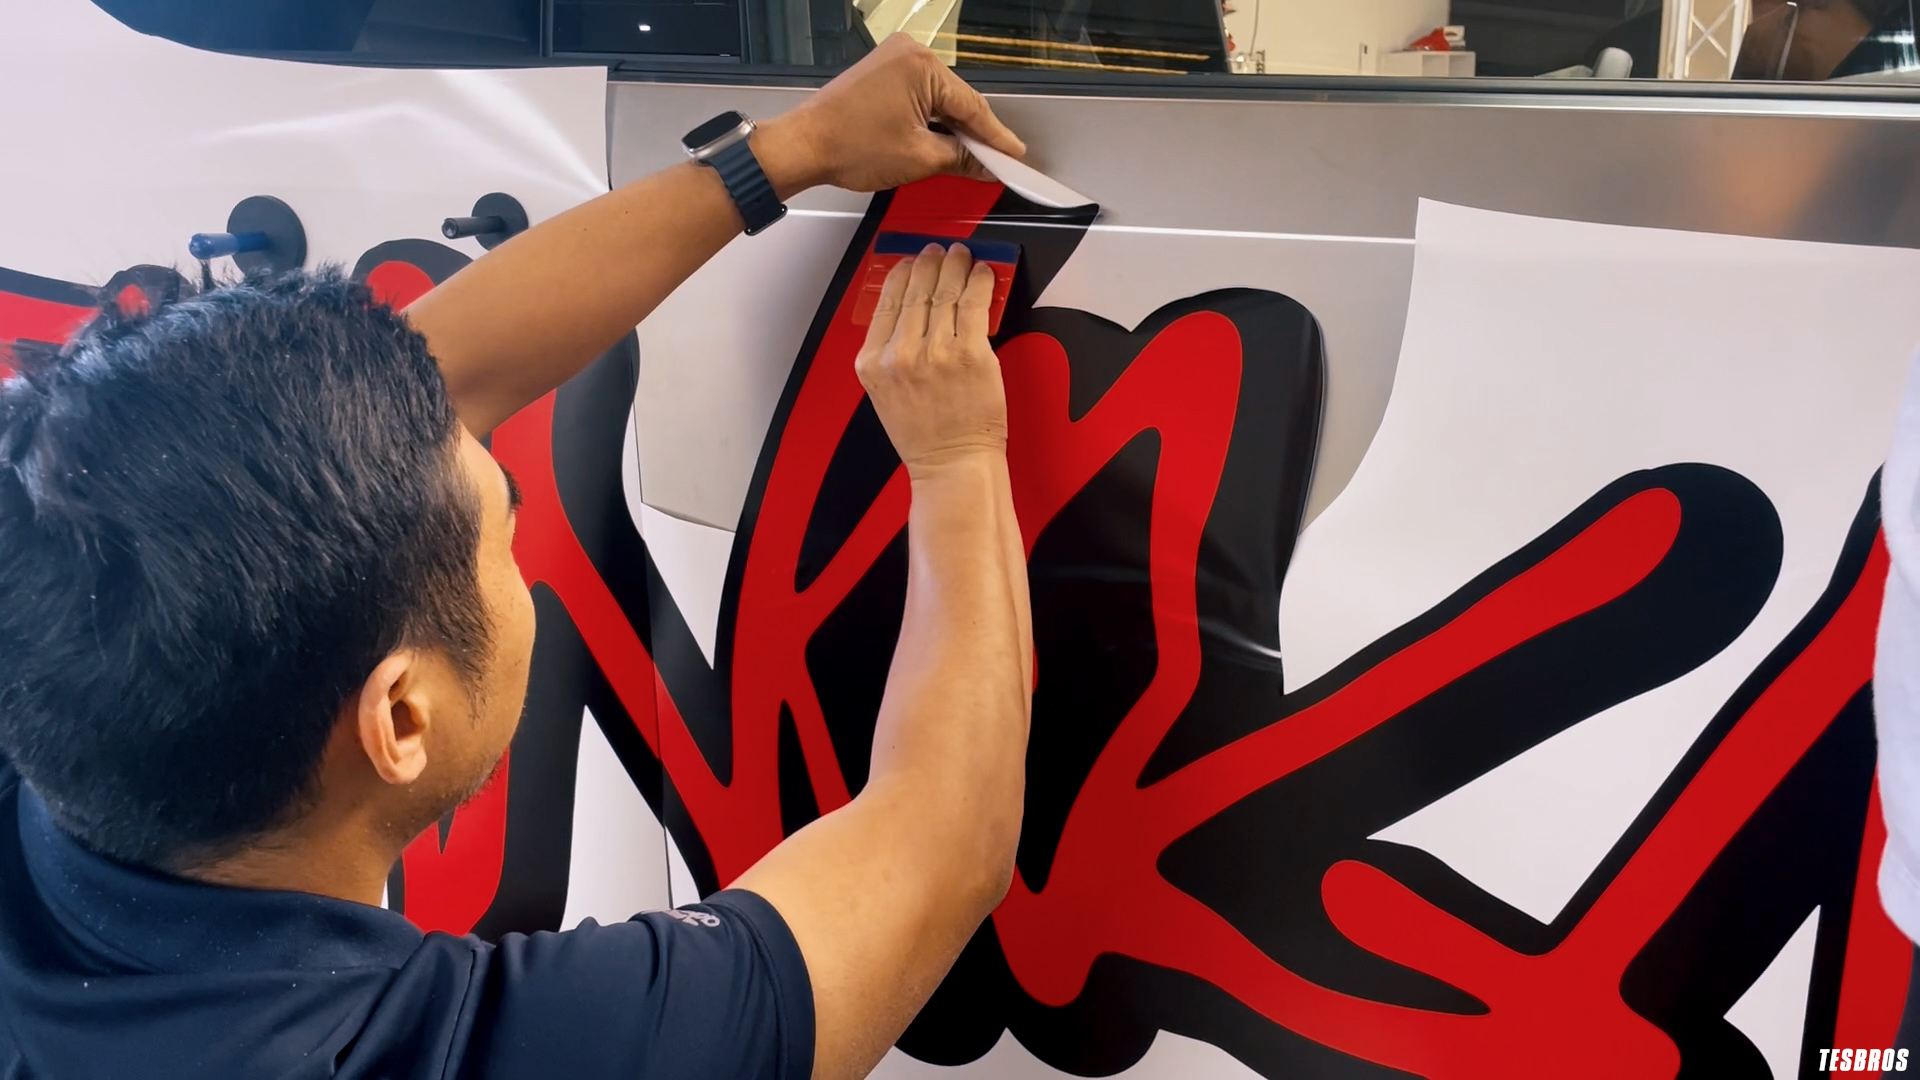
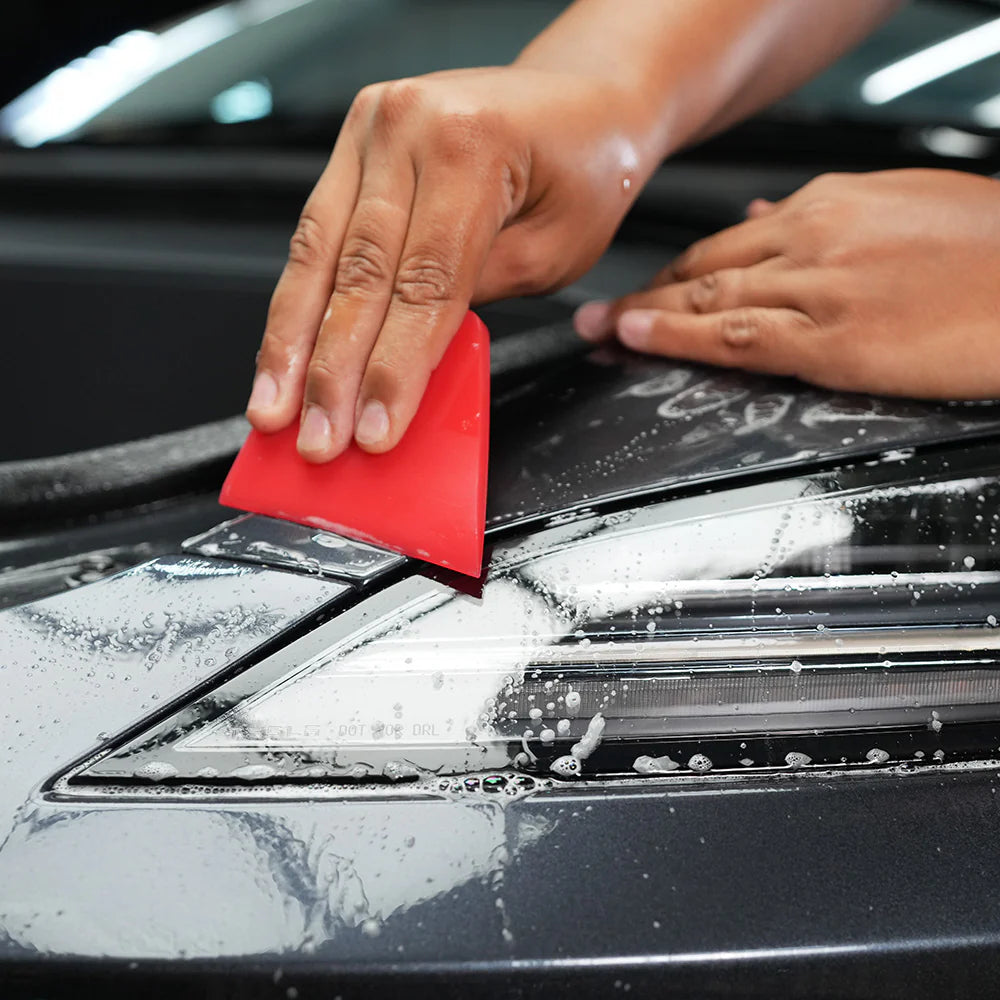
Begin smoothing the film by using a squeegee, starting from the center and working outward. This technique pushes out air bubbles and excess solution, ensuring a smooth finish.
Finally, inspect the applied film for any remaining air bubbles or imperfections. If you spot bubbles, gently lift the edge of the film or use a pin to release trapped air. Allow the film to cure for 24-48 hours, during which you should avoid washing the car or exposing it to heavy moisture. This curing period helps the adhesive bond fully to the surface.
Even with careful planning, mistakes can happen during a DIY PPF installation. Here are some common pitfalls and how to avoid them:
One of the most critical steps is thoroughly preparing the car’s surface. Skipping this step or rushing through it can lead to poor adhesion, air bubbles, or trapped debris under the film. Always clean the surface meticulously using soap, water, and an alcohol-based cleaner, and consider using a clay bar for the smoothest finish.
Using too little or an incorrect application solution can make it hard to position the film correctly. Without enough solution, the film might stick prematurely, making adjustments difficult. Always ensure the surface is generously sprayed with a proper solution (like water with a few drops of baby shampoo) to allow the film to glide smoothly into place.
Applying uneven pressure or rushing while using the squeegee can result in air bubbles and wrinkles. Always start from the center and work outward, using consistent, even strokes to push out air and excess solution. Use a soft-edge squeegee to avoid scratching the film.
After applying the film, neglecting the curing process can compromise its effectiveness. Avoid washing the car or exposing it to heavy moisture for at least 24-48 hours to allow the adhesive to set properly. Inspect your work carefully during this period to catch and fix any issues early.
Read Also:
Yes, PPF can be removed, but it requires careful handling. Use heat (like a hair dryer) to soften the adhesive, and slowly peel the film away to avoid damaging the car’s paint. If adhesive residue remains, clean it with an alcohol-based cleaner.
High-quality PPF can last between 5 to 10 years, depending on the brand, maintenance, and environmental exposure. Regular cleaning and avoiding harsh chemicals will help extend its lifespan.
Yes, DIY PPF can be applied to almost any car model. Pre-cut kits are available for many popular cars, and custom rolls can be trimmed to fit unique designs or less common models.
No, PPF will not stick to ceramic coating. However, you may put ceramic coating on top of PPF.
Yes, PPF acts as a barrier against acidic contaminants like bird droppings and tree sap. However, it’s important to clean these substances off promptly to prevent staining.
Absolutely. PPF is a great way to protect headlights from UV damage, yellowing, and scratches. Ensure the film is suitable for plastic surfaces if applying it to headlights.